
Garage Gym Flooring Guide: Pick the Right Floor Before You Buy More Equipment
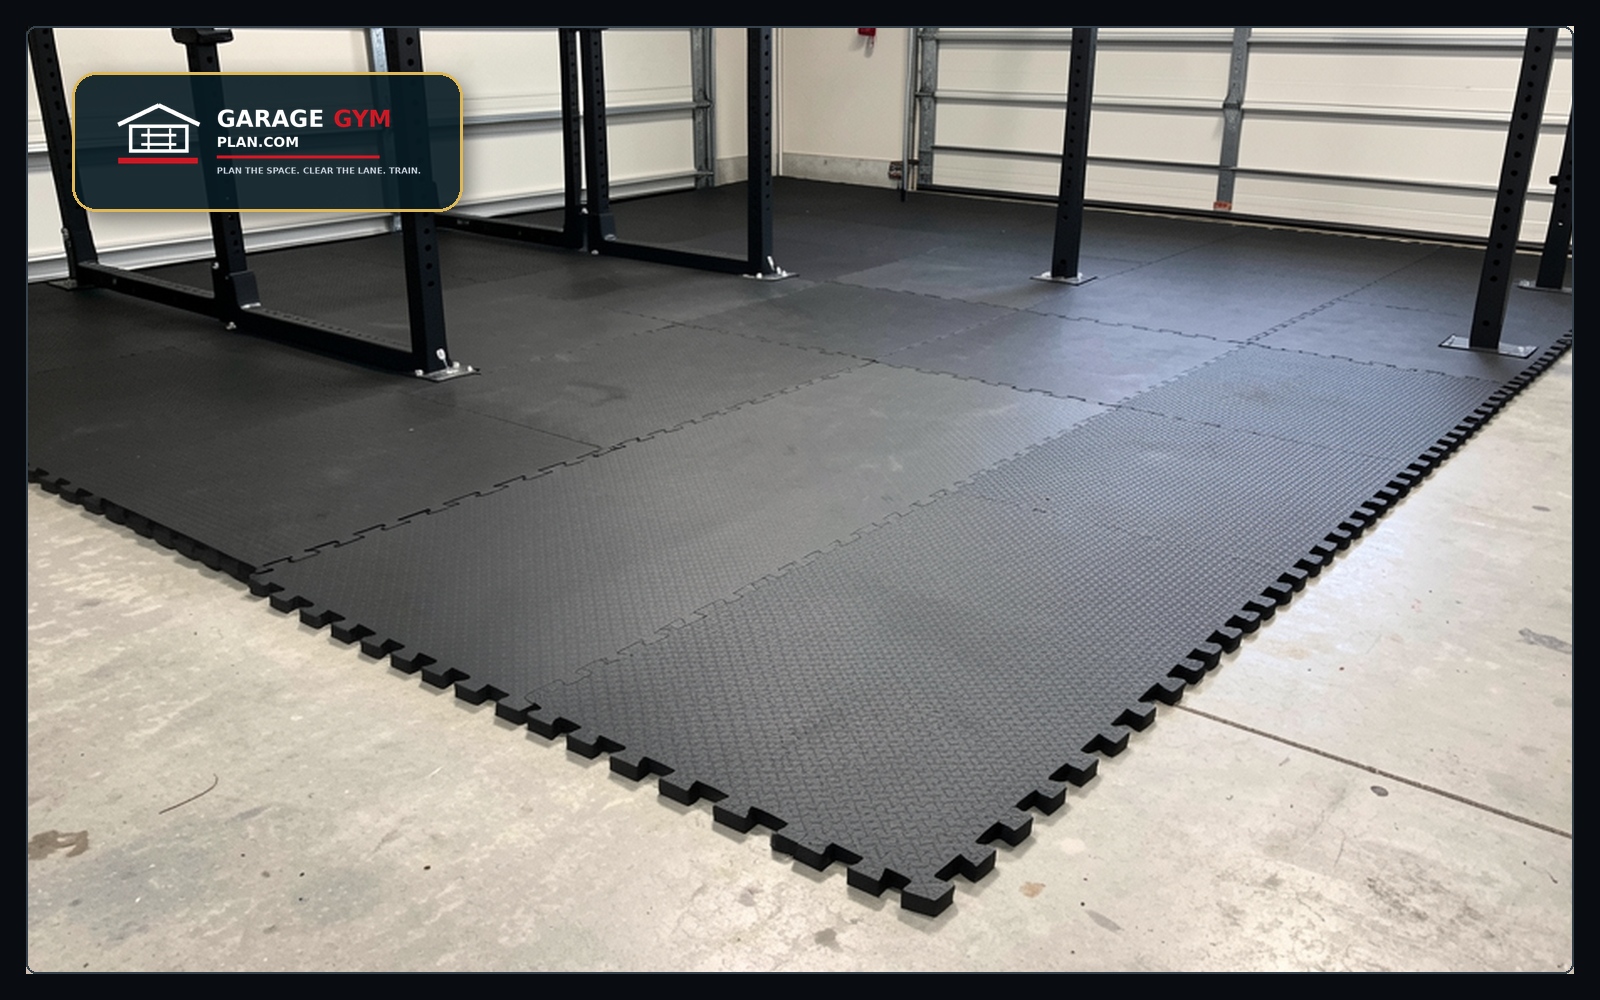
Garage gym flooring is one of the few purchases that affects every workout, every storage decision, and every future equipment upgrade.
The right choice is not always the thickest or most expensive surface. It is the floor plan that protects your training zone, fits the garage, controls noise, and leaves room in the budget for the gear you will actually use.
Use this guide to choose between mats, tiles, rubber rolls, platforms, and mixed flooring zones before you spend money twice.
Quick answer
Most garage gyms should start by mapping the training zone, then choose flooring by use case: stall mats or heavy rubber mats for basic strength work, rubber rolls for cleaner wall-to-wall coverage, tiles for modular spaces, and a dedicated platform zone for repeated barbell drops.
Start with the floor plan, not the flooring product
Draw the rectangle where workouts happen before comparing mat thickness or roll widths. A floor that looks great wall-to-wall can still fail if the rack, bench, car path, and storage wall do not have enough space.
For a budget-conscious build, cover the active training lane first. That usually gives more value than flooring every corner of the garage before the final equipment layout is known.
Garage gym flooring options
Heavy rubber mats are the simplest starting point for many garage gyms because they can cover a rack, bench, dumbbell, or kettlebell zone without a full-room install.
Rubber rolls can look cleaner and reduce seams, but they require a more certain layout and a larger upfront commitment.
Interlocking tiles are useful when the room changes over time, but thin tiles may shift or feel less solid under heavy equipment.
A lifting platform is best when repeated barbell drops, deadlifts, or Olympic lifting are central to the plan.
Bare concrete can remain in parking, tool, or storage zones if the training rectangle is protected.
Flooring fit checks before ordering
Measure the garage door path, car-door swing, step thresholds, and any floor drains before deciding how far flooring should extend.
Check whether the flooring height creates a trip point at doors or around a platform.
Decide where shelves, racks, plate storage, and benches will sit so seams do not land in awkward loading or foot positions.
If the garage still parks a car, keep tire paths and dirty/wet zones separate from the workout surface when possible.
Budget sequence for flooring
First, cover the safe training zone where your hands, feet, bench, dumbbells, kettlebells, or barbell work happens.
Second, add rack or platform protection if heavy lifting is central to the gym.
Third, expand comfort zones for mobility, conditioning, or stretching.
Last, upgrade wall-to-wall appearance only after the equipment footprint stops changing.
Flooring mistakes that cost extra later
Buying wall-to-wall flooring before choosing rack and storage placement.
Ignoring door thresholds, garage tracks, drains, and car traffic.
Using soft or unstable surfaces under heavy racks or benches.
Forgetting that flooring changes the height of stored equipment, racks, and door clearance.
Spending the whole budget on the floor before the training system is usable.
Garage gym flooring chooser
| Best fit | Flooring choice | Main check before buying | Compare |
|---|---|---|---|
| Basic strength zone | Heavy rubber mats | Rack, bench, and dumbbell footprint | View options |
| Clean finished garage look | Rubber rolls | Final layout certainty and install effort | View options |
| Changing or modular room | Interlocking tiles | Stability under equipment | View options |
| Barbell-drop training | Lifting platform | Height, noise, and space around the platform | Plan first |
| Shared garage with parking | Mixed mat plus concrete zones | Car path, water, and dirt separation | Plan first |
Choose the floor by training zone
A floor choice gets easier when the room is split into zones: rack and bench work, dumbbell work, conditioning, mobility, parking, and storage. Each zone can use a different level of protection instead of forcing one expensive material across the whole garage.
For most home gyms, the first zone is the rectangle where feet, bench legs, dumbbells, kettlebells, or plates contact the floor. Protect that zone before spending money on corners that will stay under shelves or car tires.
- Rack or bench zone: stable rubber, a platform, or heavy mats with seams away from foot positions.
- Dumbbell and kettlebell zone: impact-resistant surface with enough grip for carries and floor work.
- Conditioning zone: surface that tolerates sweat, movement, and repeated cleaning.
- Parking or tool zone: leave concrete exposed when mats would trap water or make cleanup harder.
Mats, rolls, tiles, and platforms compared
Heavy mats are the simplest first layer because they can be bought in stages and moved as the layout changes. The tradeoff is seams, odor management, weight, and less polished appearance.
Rubber rolls create a cleaner full-room look, but they make more sense after rack location, storage walls, door paths, and car use are already settled. Tiles are easier to change later, though thin tiles can feel less solid under heavy equipment.
A lifting platform is a separate decision. Use it when repeated deadlifts, Olympic lifts, or dropped weights are central to the gym; skip it when the platform would steal the only walking lane or raise the rack too close to the ceiling.
Concrete, moisture, and garage-door checks
Before ordering flooring, check whether the slab gets wet from cars, weather, washing, or humidity. A mat that looks perfect in a product photo can trap moisture if the garage regularly brings in water.
Test door thresholds, floor drains, slopes, and transition edges. Flooring that creates a trip point or blocks drainage can make the garage less useful even if the workout zone feels better.
If the garage still parks a car, keep tire paths separate from the main workout surface when possible. That reduces grime on the training zone and makes the gym easier to reset.
Flooring layout examples
A rack-first garage usually needs one continuous surface under the rack, bench path, and plate-loading area. A dumbbell-first garage can often start with a smaller mat zone plus open floor for carries, mobility, and kettlebell work. A shared parking garage may need a removable or partial surface instead of wall-to-wall rubber.
The right floor plan is the one that supports the most common workout without creating problems at doors, drains, garage thresholds, or car paths.
- Rack lane: protect the rack feet, bench legs, bar path, and plate loading stance.
- Open-floor lane: keep enough uninterrupted surface for mobility, warmups, carries, and dumbbell work.
- Storage edge: avoid seams where shelves, rolling benches, and plate trees move.
- Parking edge: avoid trapping water or tire grime under permanent mats.
How to stage flooring purchases
Buy the first flooring layer around the part of the garage that trains now. If the gym starts with a rack and bench, cover that rectangle first. If it starts with dumbbells or kettlebells, cover the pickup and movement zone first. Expand only after the room proves where feet, benches, weights, and storage actually land.
Staging prevents two common mistakes: covering too much of the wrong area, and buying flooring so thick that it creates ceiling, threshold, or door-clearance problems later.
- Stage one: active training rectangle.
- Stage two: rack, bench, or platform expansion after equipment placement is proven.
- Stage three: comfort and visual upgrades after the garage still works.
Flooring maintenance and replacement checks
Garage flooring has to handle sweat, dust, tire grit, humidity, dropped accessories, and repeated cleaning. Choose a surface you will actually maintain. A cheaper surface that gets cleaned and reset beats a premium surface that traps water or hides clutter.
Check seams, raised edges, odor, moisture under mats, and shifting tiles during the first month. Early corrections are easier than rebuilding the gym around a flooring problem.
- Lift a corner occasionally to check for moisture or grit.
- Move seams away from bench feet and lifting stance if they shift.
- Keep cleaning supplies near the gym so sweat and chalk do not become permanent garage grime.
Common flooring mistakes
The biggest flooring mistake is covering the garage before the layout is proven. A second mistake is buying flooring only by thickness without checking firmness, smell, seams, water behavior, and how the surface feels under a bench or rack. A third mistake is ignoring the edge where the gym meets the rest of the garage.
Treat flooring as part of the whole system. A stable rack surface, a safe bench path, a clean transition, and easy maintenance matter more than making every square foot match on day one.
- Do not put seams under the exact stance or bench feet if they can shift.
- Do not block floor drains, door thresholds, or water paths.
- Do not raise the rack into a ceiling or garage-door conflict without remeasuring.
- Do not assume wall-to-wall rubber is better for a garage that still parks a wet car.
Use this in the Garage Gym Planning System
Use the Planning System flooring worksheet to calculate the first zone, expansion zone, and buy-later zone before ordering mats, rolls, or tiles.
- Worksheet module: flooring calculator + zone-cost worksheet
- Best next step: measure the room, score the fit, and place this purchase into a buy-now or buy-later sequence.
- Planning value: fewer wrong purchases, faster setup, and a gym that stays easier to use.
Flooring decision guide
The best garage gym floor is the one that matches the training zone. A lifting lane, dumbbell area, cardio corner, and car path may need different levels of coverage.
| Flooring choice | Use it when | Check first |
|---|---|---|
| Horse stall mats / heavy rubber mats | You need durable coverage for racks, benches, and general strength training. | Thickness, odor, moisture under mats, door clearance, and how pieces meet at seams. |
| Rubber rolls | You want a cleaner wall-to-wall look and fewer seams in a dedicated gym bay. | Delivery weight, adhesive/no-adhesive plan, moisture, and whether you can move it later. |
| Tiles | You need smaller pieces, easier handling, or partial coverage around existing storage. | Edge movement, thickness consistency, trip points, and warranty language for gym use. |
| Platform | Pulling from the floor is a core use case and you need a defined lifting zone. | Height added to the rack area, platform edges, noise, and the landing path around plates. |
- Test garage-door clearance after adding flooring thickness.
- Leave moisture a way to dry before covering the whole slab.
- Stage flooring purchases around the rack and deadlift zones first, then expand if the car path still works.
Related planning guides
- Garage gym measurement checklist
- Small garage gym ideas
- Half garage gym ideas
- Garage Gym Planning System
Garage Gym Reset Kit
Measure the garage, choose the storage path, and turn the plan into a printable checklist before buying more equipment.
See the Garage Gym Reset KitTrust check for this decision
The safest choice is the one that fits your measured room and the manufacturer’s current installation requirements. Do not rely on a category name alone. Match the product dimensions to your rack zone, wall structure, walking lane, and storage reset routine.
Before checkout, compare the product page against your garage notes: clearance, mounting surface, weight capacity language, included hardware, delivery weight, and return window. If any of those details are unclear, choose the more conservative option or keep planning with the Garage Gym Reset Kit.
Flooring evidence checks before buying
Use these numbers as planning checks, not as live product claims. Final purchases should be verified against the current listing and manufacturer instructions.
- Measure first: Write down total square footage, lifting-zone square footage, door threshold height, and whether a car will park on the flooring.
- Budget reality: Planning ranges vary widely: basic rubber mats can be a lower-cost zone solution, while full-room tile/roll systems cost more after shipping, seams, trim, and adhesive.
- Safety note: Keep seams flat, remove curled edges, and do not leave raised transitions in the walking lane.