
Garage Gym Setup Sequence: Plan, Clear, Floor, Rack, Store, Train
The right setup order prevents rework: measure first, clear the lane, place the floor and rack, then add storage around real workouts.
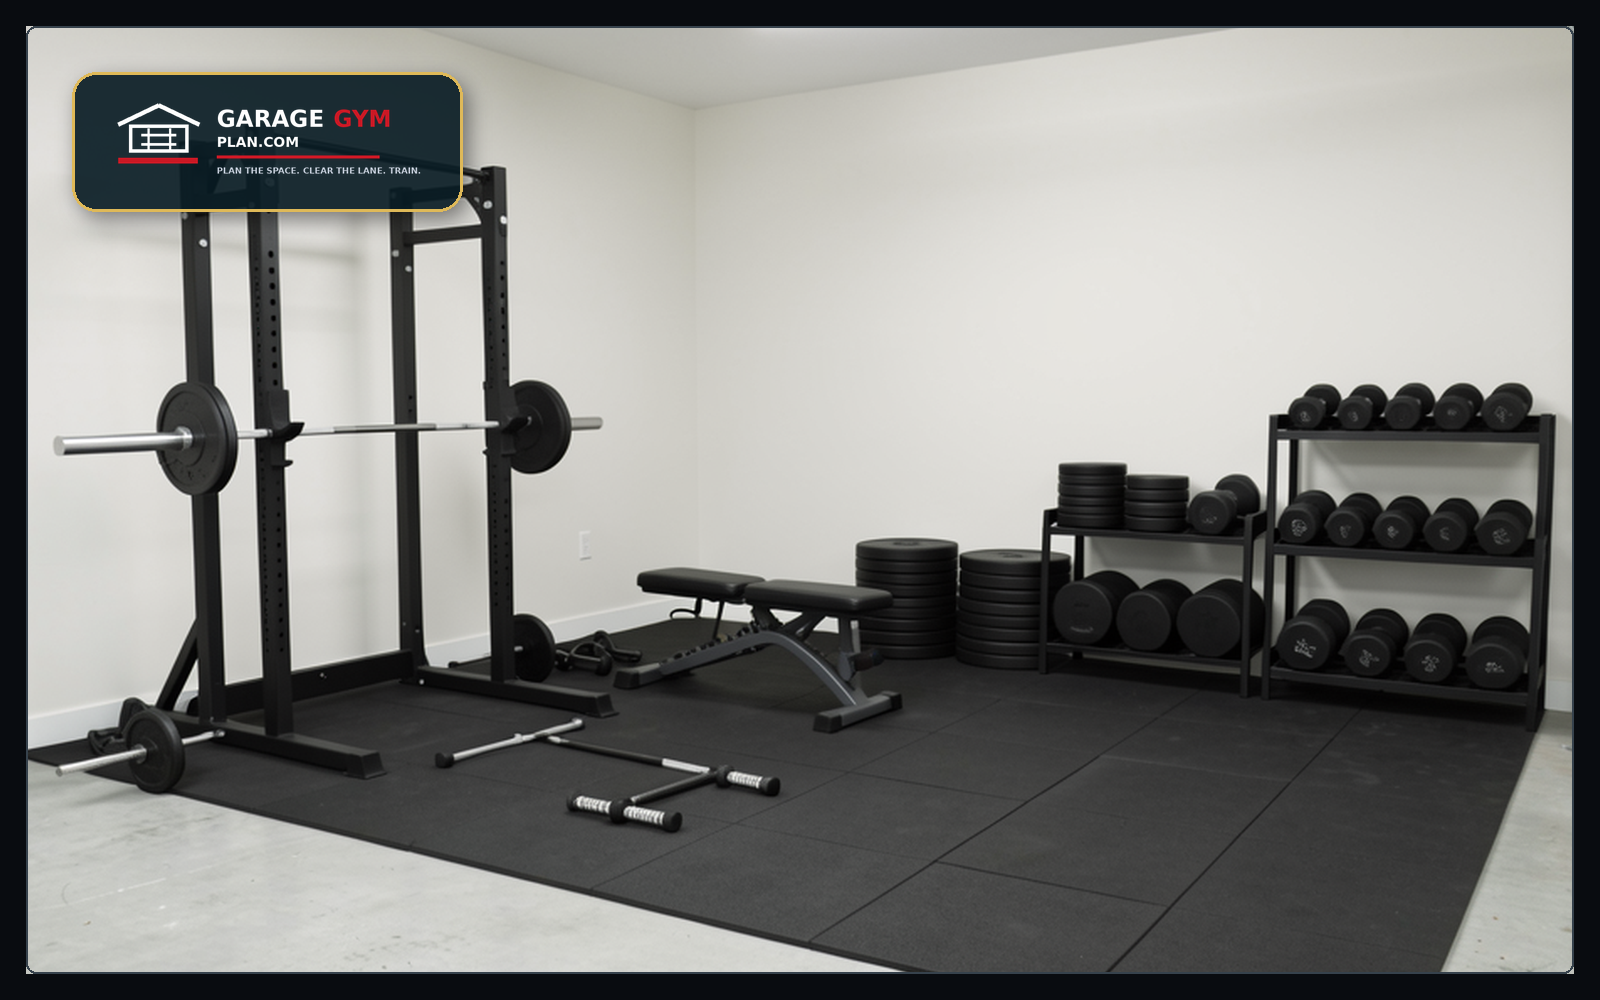
Use this guide if
- You are starting from a cluttered garage
- You want to avoid moving heavy equipment twice
- You need a weekend-friendly order that gets the gym usable quickly
The planning sequence
- Step 1: Measure fixed obstacles and draw the training lane
- Step 2: Remove items that do not belong in the gym zone
- Step 3: Place flooring only after the lane and rack location are chosen
- Step 4: Set the rack, bench, and weights before adding accessory storage
- Step 5: Train for a week, then add shelves, hooks, bins, and labels around real use
Common mistakes to avoid
- Buying storage first and designing the gym around leftover shelves
- Installing flooring before deciding where the rack belongs
- Trying to perfect accessories before the main lifts are usable
Next pages to plan with this
Use these guides to connect the layout decision to measurement, storage, flooring, and buying order.
Garage Gym Setup Sequence: the practical planning layer
Use this section when the basic answer is not enough and you need to decide how the setup should work in a real garage. The goal is not to add more gear; it is to make the garage gym setup sequence choice fit the way you train, park, clean, and move through the space.
Gaps to solve before you buy or rearrange
- Detailed guidance on garage floor preparation and specific flooring options (mats, tiles, epoxy) with DIY installation instructions.. Detailed guidance on garage floor preparation and specific flooring options (mats, tiles, epoxy) with DIY installation instructions.
- Comprehensive advice on climate control solutions (insulation, heating, cooling, ventilation) to make the garage gym comfortable year-round.. Comprehensive advice on climate control solutions (insulation, heating, cooling, ventilation) to make the garage gym comfortable year-round.
- Specific electrical considerations, including requirements for heavy-duty equipment, optimal lighting design, and outlet placement.. Specific electrical considerations, including requirements for heavy-duty equipment, optimal lighting design, and outlet placement.
- Smart storage and organization hacks for maximizing space efficiency and keeping the garage gym clutter-free.. Smart storage and organization hacks for maximizing space efficiency and keeping the garage gym clutter-free.
- A stage-by-stage budget breakdown for building a garage gym, including cost-saving strategies for each phase.. A stage-by-stage budget breakdown for building a garage gym, including cost-saving strategies for each phase.
Choose this approach when
- Buy the piece that removes the biggest training bottleneck first, not the piece that looks best in a finished gym photo.
- Check footprint, storage, warranty, return rules, and replacement parts before ordering.
- A cheaper item is not cheaper if it forces a second purchase or blocks the main lift lane.
- You can explain where the item starts, where it goes during the workout, and where it returns afterward.
- The choice improves the main training lane instead of only making the room look more finished.
- The setup still works on a tired day when you are less careful about putting everything back perfectly.
Planning modules to work through
Why Build a Garage Gym? The Benefits
- Enjoy unparalleled convenience and privacy for your workouts.
- Achieve significant cost savings over long-term commercial gym memberships.
- Create a personalized fitness environment perfectly tailored to your goals.
Phase 1: Initial Planning and Assessment
- Measure garage dimensions, ceiling height, and assess existing electrical outlets.
- Sketch out potential layouts for equipment placement and movement zones.
- Allocate funds for essential equipment, flooring, and potential renovations, prioritizing purchases.
Phase 2: Preparing the Environment
- Declutter the garage and perform a deep clean, addressing any structural issues or repairs.
- Install durable rubber mats or interlocking tiles for impact absorption and protection.
- Upgrade lighting for safety and visibility, and consider fans or heaters for climate control.
Phase 3: Building Your Strength Foundation
- Select a power rack or squat stand based on space, budget, and desired exercises, ensuring stability.
- Invest in a high-quality Olympic barbell, appropriate weight plates (bumper or iron), and secure collars.
- Choose a sturdy adjustable bench with flat, incline, and decline capabilities, verifying its weight capacity.
Phase 4: Expanding Your Workout Versatility
- Add a versatile range of dumbbells or adjustable sets, along with kettlebells and resistance bands.
- Integrate cardio equipment like a rower, exercise bike, or jump rope, considering compact options.
- Explore specialty bars, chains, or additional attachments to further diversify your training.
Phase 5: Organization, Aesthetics, and Safety
- Utilize wall-mounted racks, plate trees, and dumbbell stands for efficient storage and a tidy space.
- Install mirrors for form checking and to visually expand the gym, adding a sound system for motivation.
- Implement strict safety protocols, including proper lifting techniques and maintaining clear pathways.
Terms and fit checks to keep straight
These related ideas tend to appear around this topic. Use them as fit checks, not as a shopping list:
- Garage Gym: confirm that this detail applies to your garage, your equipment, and your training style before treating it as a must-have.
- Home Gym: confirm that this detail applies to your garage, your equipment, and your training style before treating it as a must-have.
- Gym Setup: confirm that this detail applies to your garage, your equipment, and your training style before treating it as a must-have.
- Rack Setup: confirm that this detail applies to your garage, your equipment, and your training style before treating it as a must-have.
- Workout Space: confirm that this detail applies to your garage, your equipment, and your training style before treating it as a must-have.
- Exercise Equipment: confirm that this detail applies to your garage, your equipment, and your training style before treating it as a must-have.
- Garage Space: confirm that this detail applies to your garage, your equipment, and your training style before treating it as a must-have.
- Optimum Floor: confirm that this detail applies to your garage, your equipment, and your training style before treating it as a must-have.
- Space Optimization: confirm that this detail applies to your garage, your equipment, and your training style before treating it as a must-have.
- Storage Space: confirm that this detail applies to your garage, your equipment, and your training style before treating it as a must-have.
Before-and-after layout check
- Measure the clear walking lane with the garage door open and closed.
- Mark the equipment footprint with painter tape, including the space needed to load, unload, and turn around.
- Stand where you will start the workout and make sure the first action is obvious.
- Put the heaviest or most awkward item back in its storage spot three times; if that feels clumsy, move the storage lower or closer.
- Check whether the setup still leaves a simple path for cleaning, parking, trash bins, bikes, or family gear.
- Take one photo from the garage entry and one photo from the rack area; if either view looks blocked, simplify before buying more.
Common questions
How much does it cost to set up a garage gym?
The cost to set up a garage gym varies significantly based on equipment choices, brand, and whether you buy new or used, ranging from a few hundred dollars for basic essentials to several thousand for a fully equipped setup. Factor in flooring and potential climate control as well.
What's the best flooring for a garage gym?
Rubber flooring, such as stall mats or interlocking tiles, is highly recommended for garage gyms due to its durability, impact absorption, and slip resistance. Polyaspartic coatings can also provide a tough, easy-to-clean surface for added protection.
How do I choose the right power rack for my space?
Consider your garage dimensions, especially ceiling height, and your fitness goals when selecting a power rack. Full power racks offer more versatility and safety for heavy lifts, while squat stands or half racks are better for smaller spaces or specific workout styles.
Can I set up a functional garage gym in a small space?
Absolutely! Optimize small spaces with multi-functional equipment like adjustable dumbbells, folding racks, wall-mounted pull-up bars, and smart storage solutions. Prioritize essential equipment that serves multiple purposes to maximize your workout area.
What are the most essential pieces of equipment to start with?
Begin with a sturdy power rack or squat stand, an Olympic barbell, a set of weight plates, and an adjustable bench. These items form the core of most strength training programs and offer significant versatility for a wide range of exercises.
When to keep it simple
Do not overbuild this page’s recommendation into a full-room remodel if the bottleneck is small. For many garage gyms, the right next move is one clear return spot, one better measurement, or one safer walking lane. Upgrade only after the current setup proves what is actually slowing down the workout.
For a deeper plan, pair this page with the garage gym measurement checklist, the layout cheat sheet, and the organization planner.
Pass 1 check: Check footprint, storage, warranty, return rules, and replacement parts before ordering. Walk through the setup as if the workout has already started: pick up the item, use it, return it, and then move to the next station. If that movement creates a trip point, a blocked car path, or a piece that never gets returned, the layout needs a smaller and clearer solution.
Pass 2 check: A cheaper item is not cheaper if it forces a second purchase or blocks the main lift lane. Walk through the setup as if the workout has already started: pick up the item, use it, return it, and then move to the next station. If that movement creates a trip point, a blocked car path, or a piece that never gets returned, the layout needs a smaller and clearer solution.
Pass 3 check: Buy the piece that removes the biggest training bottleneck first, not the piece that looks best in a finished gym photo. Walk through the setup as if the workout has already started: pick up the item, use it, return it, and then move to the next station. If that movement creates a trip point, a blocked car path, or a piece that never gets returned, the layout needs a smaller and clearer solution.
Pass 4 check: Check footprint, storage, warranty, return rules, and replacement parts before ordering. Walk through the setup as if the workout has already started: pick up the item, use it, return it, and then move to the next station. If that movement creates a trip point, a blocked car path, or a piece that never gets returned, the layout needs a smaller and clearer solution.
Pass 5 check: A cheaper item is not cheaper if it forces a second purchase or blocks the main lift lane. Walk through the setup as if the workout has already started: pick up the item, use it, return it, and then move to the next station. If that movement creates a trip point, a blocked car path, or a piece that never gets returned, the layout needs a smaller and clearer solution.
Pass 6 check: Buy the piece that removes the biggest training bottleneck first, not the piece that looks best in a finished gym photo. Walk through the setup as if the workout has already started: pick up the item, use it, return it, and then move to the next station. If that movement creates a trip point, a blocked car path, or a piece that never gets returned, the layout needs a smaller and clearer solution.
Pass 7 check: Check footprint, storage, warranty, return rules, and replacement parts before ordering. Walk through the setup as if the workout has already started: pick up the item, use it, return it, and then move to the next station. If that movement creates a trip point, a blocked car path, or a piece that never gets returned, the layout needs a smaller and clearer solution.
Pass 8 check: A cheaper item is not cheaper if it forces a second purchase or blocks the main lift lane. Walk through the setup as if the workout has already started: pick up the item, use it, return it, and then move to the next station. If that movement creates a trip point, a blocked car path, or a piece that never gets returned, the layout needs a smaller and clearer solution.
Pass 9 check: Buy the piece that removes the biggest training bottleneck first, not the piece that looks best in a finished gym photo. Walk through the setup as if the workout has already started: pick up the item, use it, return it, and then move to the next station. If that movement creates a trip point, a blocked car path, or a piece that never gets returned, the layout needs a smaller and clearer solution.
Pass 10 check: Check footprint, storage, warranty, return rules, and replacement parts before ordering. Walk through the setup as if the workout has already started: pick up the item, use it, return it, and then move to the next station. If that movement creates a trip point, a blocked car path, or a piece that never gets returned, the layout needs a smaller and clearer solution.
Pass 11 check: A cheaper item is not cheaper if it forces a second purchase or blocks the main lift lane. Walk through the setup as if the workout has already started: pick up the item, use it, return it, and then move to the next station. If that movement creates a trip point, a blocked car path, or a piece that never gets returned, the layout needs a smaller and clearer solution.
Pass 12 check: Buy the piece that removes the biggest training bottleneck first, not the piece that looks best in a finished gym photo. Walk through the setup as if the workout has already started: pick up the item, use it, return it, and then move to the next station. If that movement creates a trip point, a blocked car path, or a piece that never gets returned, the layout needs a smaller and clearer solution.
Pass 13 check: Check footprint, storage, warranty, return rules, and replacement parts before ordering. Walk through the setup as if the workout has already started: pick up the item, use it, return it, and then move to the next station. If that movement creates a trip point, a blocked car path, or a piece that never gets returned, the layout needs a smaller and clearer solution.
Pass 14 check: A cheaper item is not cheaper if it forces a second purchase or blocks the main lift lane. Walk through the setup as if the workout has already started: pick up the item, use it, return it, and then move to the next station. If that movement creates a trip point, a blocked car path, or a piece that never gets returned, the layout needs a smaller and clearer solution.
Pass 15 check: Buy the piece that removes the biggest training bottleneck first, not the piece that looks best in a finished gym photo. Walk through the setup as if the workout has already started: pick up the item, use it, return it, and then move to the next station. If that movement creates a trip point, a blocked car path, or a piece that never gets returned, the layout needs a smaller and clearer solution.
Pass 16 check: Check footprint, storage, warranty, return rules, and replacement parts before ordering. Walk through the setup as if the workout has already started: pick up the item, use it, return it, and then move to the next station. If that movement creates a trip point, a blocked car path, or a piece that never gets returned, the layout needs a smaller and clearer solution.
Pass 17 check: A cheaper item is not cheaper if it forces a second purchase or blocks the main lift lane. Walk through the setup as if the workout has already started: pick up the item, use it, return it, and then move to the next station. If that movement creates a trip point, a blocked car path, or a piece that never gets returned, the layout needs a smaller and clearer solution.
Pass 18 check: Buy the piece that removes the biggest training bottleneck first, not the piece that looks best in a finished gym photo. Walk through the setup as if the workout has already started: pick up the item, use it, return it, and then move to the next station. If that movement creates a trip point, a blocked car path, or a piece that never gets returned, the layout needs a smaller and clearer solution.
Pass 19 check: Check footprint, storage, warranty, return rules, and replacement parts before ordering. Walk through the setup as if the workout has already started: pick up the item, use it, return it, and then move to the next station. If that movement creates a trip point, a blocked car path, or a piece that never gets returned, the layout needs a smaller and clearer solution.
Garage Gym Reset Kit
Measure the garage, choose the storage path, and turn the plan into a printable checklist before buying more equipment.
See the Garage Gym Reset KitMeasurement and buying sanity checks
Use these checks as planning help, not as live product claims.
- Measure first: Record the exact wall width, depth, ceiling height, car-door swing, walking lane, and reset location before buying storage.
- Verify product details: Check current price, dimensions, weight capacity, hardware, shipping, return policy, and manufacturer instructions on the live listing.
- Protect the lane: A product is a bad fit if it creates a toe-stub, blocks the car, hides daily gear, or requires moving unrelated items before training.