
Garage Gym Organization Checklist: Print, Measure, and Organize Your Setup
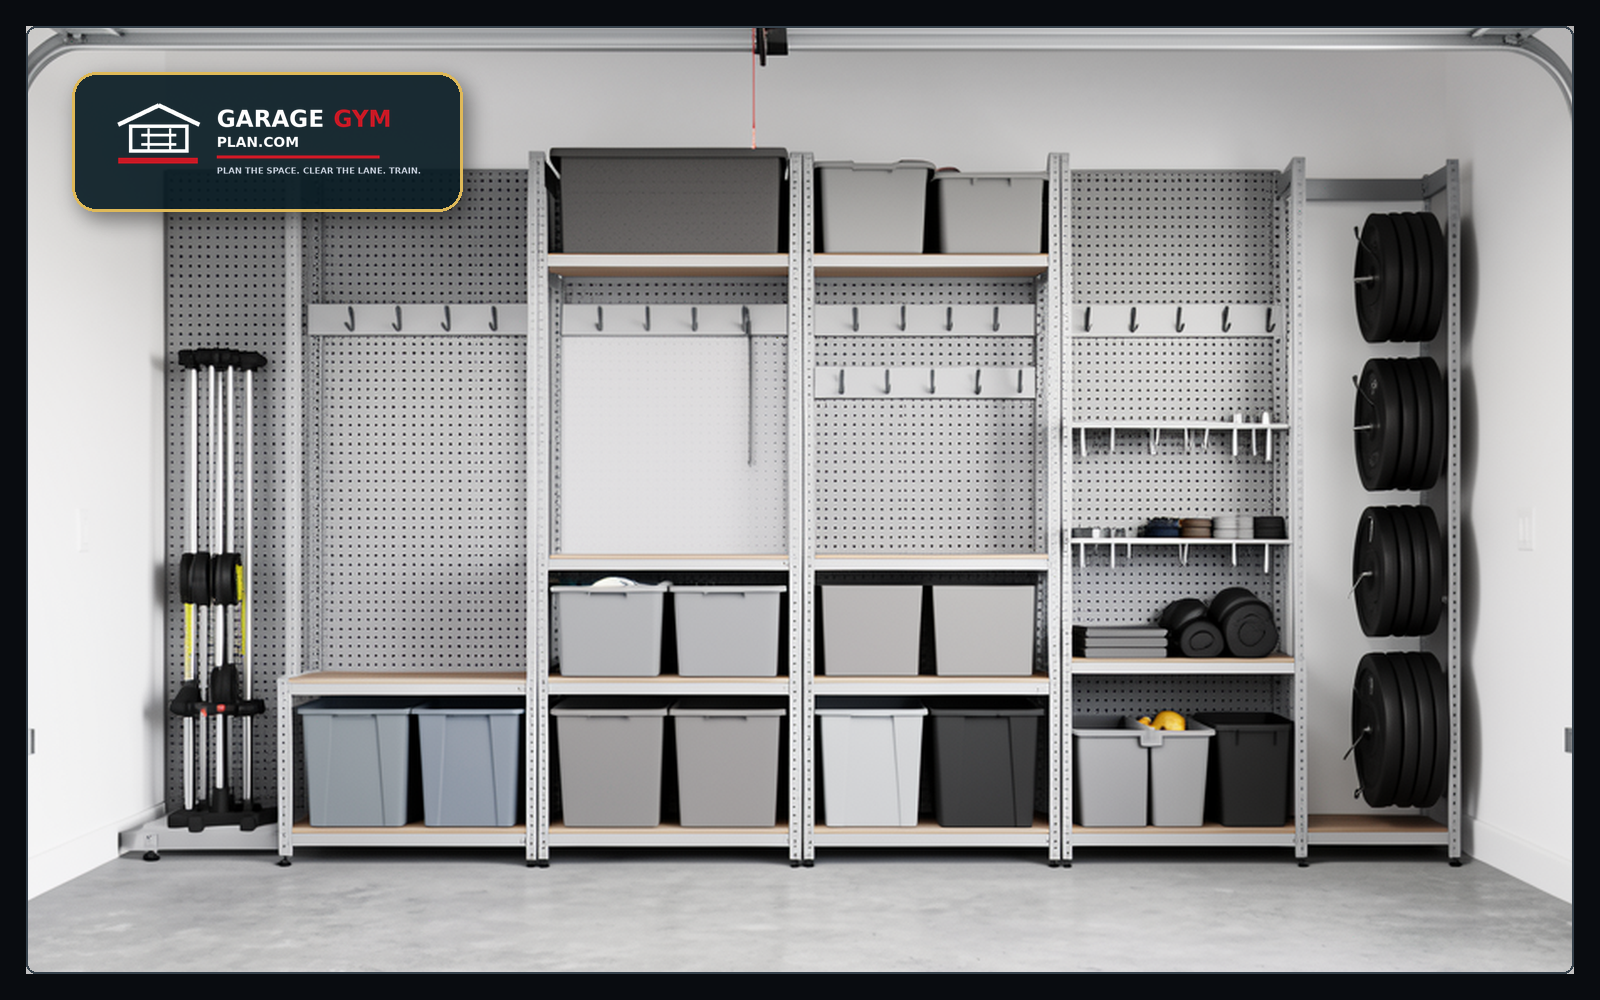
A garage gym organization checklist should start with safety and workout flow, not storage products. Clear the lifting lane, get long and heavy gear out of the walking path, keep frequently used accessories near the rack or cable station, and measure before buying wall, rack, or floor storage.
Print this checklist, copy it into notes, or work through the sections before buying more storage.
Quick start:
- Clear the training lane.
- Create a barbell and plate zone.
- Put bands, collars, and cable attachments near where they are used.
- Measure wall, rack, door, and car clearances before buying storage.
- Label shelves and bins for low-use items.
- Add a two-minute reset rule after every workout.
Want the worksheet version? Open the printable Garage Gym Reset Kit. Use it to measure zones, list gear, and plan your reset routine.
Printable garage gym organization checklist
How to use this section: Print this page or copy the checklist into your notes app. Walk the garage once with a tape measure, marker, and a few temporary labels. Check off safety and flow first, then storage zones.
1. Safety path and training lane
- [ ] Clear the path from the house/garage entrance to the training area.
- [ ] Clear the area where you squat, bench, press, pull, or carry equipment.
- [ ] Remove loose plates, bands, collars, handles, tools, and household items from the walking path.
- [ ] Check that mat edges do not curl into the lifting lane.
- [ ] Check that stored gear does not block garage door movement, tracks, or sensors.
- [ ] Check that stored gear does not block car doors, driver access, or bumper clearance.
- [ ] Check that kids, pets, and guests can move through the garage without stepping over bars or tools.
- [ ] Add temporary tape marks for the training lane if the garage is shared.
Next step: If the garage is tight, use Small garage gym storage before buying new storage.
2. Barbell and specialty bar storage
- [ ] Count every straight bar, curl bar, trap bar, safety squat bar, axle, and specialty bar.
- [ ] Identify which bars are used weekly vs occasionally.
- [ ] Move loose bars out of the walking path.
- [ ] Decide whether straight bars need wall-mounted, vertical, or rack-adjacent storage.
- [ ] Check whether specialty bars have handles, pads, sleeves, or frames that need extra clearance.
- [ ] Do not assume specialty bars fit standard straight-bar holders.
- [ ] Mark the future storage area before installing or buying anything.
- [ ] Verify manufacturer instructions, product details, mounting requirements, clearance, and compatibility before choosing products.
Related garage gym storage guides: Wall-mounted barbell racks, Vertical barbell storage, Specialty barbell storage.
3. Plates, change plates, and loading workflow
- [ ] Move plates out of the walking path and away from door swing.
- [ ] Group plates near the barbell loading area.
- [ ] Put small change plates where they are visible and easy to return.
- [ ] Check that plate storage does not block rack movement or bar loading.
- [ ] Decide whether floor storage, rack storage, or a dedicated plate zone fits the layout.
- [ ] Store deadlift deadlift jack wedges or jacks near the plates, not across the garage.
- [ ] Keep the pulling lane clear after plate changes.
Next step: Deadlift jack storage for full jack vs mini jack vs wedge decisions.
4. Bands, collars, straps, and rack accessories
- [ ] Gather all bands, collars, chains, straps, wraps, and small rack accessories.
- [ ] Separate daily-use items from backups.
- [ ] Store daily-use bands and collars near the rack.
- [ ] Use visible pegs, hooks, or labeled homes instead of a deep mixed bin.
- [ ] Check rack attachment compatibility before buying rack-mounted pegs or hooks.
- [ ] Keep accessories from catching sleeves, arms, plates, or bar movement.
- [ ] Label backup accessories separately from daily-use gear.
Next step: Band peg storage for rack and wall accessory organization.
5. Cable attachments, handles, ropes, and straps
- [ ] Gather D-handles, ropes, straight bars, V-bars, ankle straps, belts, clips, and specialty handles.
- [ ] Sort by frequency: every week, occasional, rarely used.
- [ ] Hang frequent-use handles where they are visible near the cable station.
- [ ] Keep ropes and straps from tangling or dragging.
- [ ] Store long bars on hooks, rails, or shelves where they do not hit a car or doorway.
- [ ] Use bins only for low-use soft accessories or backups.
- [ ] Keep this zone about gym cable attachments, not electrical cable management.
Next step: Cable attachment storage.
6. Wall storage and mounting planning
- [ ] Choose the wall zone before buying panels, hooks, racks, or rails.
- [ ] Identify the wall type and likely mounting points.
- [ ] Mark studs or appropriate mounting areas only after verifying with proper tools/process.
- [ ] Check product instructions before making mounting decisions.
- [ ] Keep heavy or awkward items low enough and secure enough for the household.
- [ ] Make sure stored items do not swing into a car lane, doorway, rack path, or garage door track.
- [ ] Avoid loading generic panels or hooks with heavy gym equipment unless the system is verified for that use.
- [ ] Photograph or sketch the wall before drilling so you can plan zones.
Related garage gym storage guides: Garage gym wall storage and Garage gym storage systems.
7. Shelves, bins, cabinets, and household overlap
- [ ] Separate gym items from household storage.
- [ ] Label shelves by function: cleaning, spare parts, bar care, wraps/sleeves, tools, extra bands, household overflow.
- [ ] Keep daily-use collars, handles, and bands out of deep bins.
- [ ] Store low-use items higher or farther away than frequent-use items.
- [ ] Keep cleaning supplies and chemicals away from training surfaces and kids/pets as appropriate.
- [ ] Create a household-return bin if family items keep entering the gym zone.
- [ ] Review the shelf zone once per month for clutter creep.
8. Two-minute reset rule
After every workout:
- [ ] Bar returned to its storage home.
- [ ] Plates returned to plate storage.
- [ ] Collars visible and paired.
- [ ] Bands back on pegs or hooks.
- [ ] Cable attachments back in their zone.
- [ ] Deadlift jack/wedge stored near the plates and out of the lane.
- [ ] Floor path clear from door to rack.
- [ ] Car lane clear if the garage is shared.
- [ ] Household overflow returned to its zone.
A storage system only works if the reset is easy when you are tired.
Measurement worksheet
Use this before buying wall racks, rack attachments, panels, hooks, shelves, or large floor storage. Fill in the blanks on paper or in a notes app.
Room and lane measurements
| Measurement | Your number / note | Why it matters | Compare |
|---|---|---|---|
| Training lane length | ______ | Confirms room for deadlifts, carries, and movement | Plan first |
| Training lane width | ______ | Keeps plates, bars, and accessories out of foot path | View options |
| Door swing clearance | ______ | Prevents hooks/shelves from blocking doors | View options |
| Garage door/track clearance | ______ | Avoids conflicts with overhead door movement | View options |
| Car lane width | ______ | Protects parking and door opening | Plan first |
| Distance from rack to wall | ______ | Helps decide rack storage vs garage gym wall storage | View options |
| Distance from plate zone to deadlift area | ______ | Keeps loading tools near use point | Plan first |
| Shelf depth available | ______ | Prevents shelves from narrowing the walkway | Plan first |
Wall planning worksheet
| Wall detail | Your note | Verification needed? |
|---|---|---|
| Wall type | ______ | Yes before mounting |
| Stud or mounting pattern | ______ | Yes before mounting |
| Obstructions: outlets/rails/doors | ______ | Yes |
| Items planned for wall | ______ | Yes if heavy/awkward |
| Mounting product options | ______ | Yes, manufacturer specs needed |
| Desired reach height | ______ | Editorial/use-point judgment |
| Car or door conflict risk | ______ | Measure/observe |
| Next step: Plan wall storage safely · Sort cable attachments | ||
Rack compatibility worksheet
| Rack detail | Your note | Why it matters |
|---|---|---|
| Rack brand/model if known | ______ | Helps verify attachments |
| Upright size | ______ | Attachment compatibility |
| Hole size | ______ | Attachment compatibility |
| Hole spacing | ______ | Attachment compatibility/layout |
| Available side of rack | ______ | Prevents crowding lifting area |
| Accessories to store on rack | ______ | Keeps daily-use items close |
| Accessories better on wall | ______ | Prevents rack clutter |
| Next step: Plan wall storage safely · Sort cable attachments | ||
Important: Use this worksheet to record your rack brand, upright size, hole size, hole spacing, and available storage side before choosing rack-mounted attachments. Verify manufacturer instructions, mounting requirements, clearance, and product fit before buying or installing storage.
Priority order: this weekend, next upgrade, later system build
This weekend: make the gym usable again
- [ ] Clear the training lane.
- [ ] Put bars and plates in temporary homes.
- [ ] Sort small accessories into visible groups.
- [ ] Label shelves and bins.
- [ ] Mark car/door clearance.
- [ ] Add the two-minute reset rule.
Next upgrade: solve the biggest recurring friction
Choose one:
- [ ] Barbell storage if bars are still on the floor.
- [ ] Band/collar storage if setup feels slow.
- [ ] Cable attachment storage if handles are tangled.
- [ ] Wall storage if floor space is disappearing.
- [ ] Deadlift jack/wedge if plate loading slows sessions.
- [ ] Small-garage storage plan if car and gym functions conflict.
Later system build: make the zones permanent
- [ ] Manufacturer-stated wall system or hooks.
- [ ] Manufacturer-stated rack attachments.
- [ ] Dedicated barbell/specialty bar storage.
- [ ] Better plate/dumbbell/kettlebell floor storage.
- [ ] Shelf/cabinet system for household overlap.
- [ ] Printed checklist posted near the rack.
Checklist section-to-guide router
| Checklist problem | Best next guide | Why |
|---|---|---|
| “I do not know where to start” | Garage gym storage ideas | Broad hub for first decisions |
| “I need a full system” | Garage gym storage systems | Compares wall, rack, floor, shelf, and modular options |
| “My garage is small” | Small garage gym storage | Protects training lane and car clearance |
| “I want wall storage” | Garage gym wall storage | Plans wall zones and mounting cautions |
| “Bars are on the floor” | Wall-mounted barbell racks or Vertical barbell storage | Chooses wall vs no-drill bar storage |
| “My trap bar or SSB is awkward” | Specialty barbell storage | Handles specialty-bar fit and clearance |
| “Bands/collars are scattered” | Band peg storage | Rack and wall accessory homes |
| “Cable handles are tangled” | Cable attachment storage | Attachment-specific storage |
| “Deadlift setup is annoying” | Deadlift jack storage | Compares full jack, mini jack, and wedge |
How to use this printable checklist today
The checklist works without an email form: print the page, copy the checklist, or use the planner for worksheet pages.
- The full value remains visible on page.
- The form clearly lists what you receive before you sign up.
- Privacy expectations are clear near the form.
- The download/print action is trackable.
This avoids the common lead-magnet mistake of hiding the useful asset before the site has trust.
FAQ
What should be first on a garage gym organization checklist?
Start with the safety path and training lane. Clear the area where you walk, lift, load plates, and move between the door and rack. Once the lane is clear, organize bars, plates, bands, collars, cable attachments, shelves, and household overlap.
Can I print this garage gym checklist?
Yes. Print this checklist or keep the on-page version handy while organizing the gym, even if you also use the downloadable planner.
What measurements should I take before buying garage gym storage?
Measure the training lane, door swing, car lane, wall area, rack upright/hole details, distance from rack to wall, shelf depth, and distance from plate storage to the deadlift area. Verify product-specific mounting or compatibility details before buying.
How do I organize a small garage gym?
Protect the training lane first, then use wall, vertical, and rack-mounted storage to reduce floor clutter. Avoid wide shelves or floor storage that narrows the walking path or blocks car access.
Should I buy storage before organizing?
Usually, no. Clear the lane, group equipment by use frequency, and mark temporary homes first. Buy storage after you know which clutter problem repeats.
How often should I reset the garage gym?
Use a two-minute reset after every workout and a deeper review once per month. The quick reset keeps daily clutter from building; the monthly review catches household overflow and unused gear.
Garage Gym Reset Kit
Measure the garage, choose the storage path, and turn the plan into a printable checklist before buying more equipment.
See the Garage Gym Reset KitGarage Gym Organization Checklist: the practical planning layer
Use this section when the basic answer is not enough and you need to decide how the setup should work in a real garage. The goal is not to add more gear; it is to make the garage gym organization checklist choice fit the way you train, park, clean, and move through the space.
Gaps to solve before you buy or rearrange
- Interactive and printable checklist template for actionable steps, rather than just a list of tips.. Interactive and printable checklist template for actionable steps, rather than just a list of tips.
- Budget-friendly and DIY organization hacks for those without a large budget for custom storage solutions.. Budget-friendly and DIY organization hacks for those without a large budget for custom storage solutions.
- Specific storage solutions for awkward or oversized equipment (e.g., battle ropes, sleds, sandbags) that don't fit standard racks.. Specific storage solutions for awkward or oversized equipment (e.g., battle ropes, sleds, sandbags) that don't fit standard racks.
- Integrating a cleaning and maintenance schedule as part of the ongoing organization process.. Integrating a cleaning and maintenance schedule as part of the ongoing organization process.
- Strategies for future-proofing your garage gym organization to accommodate new equipment or evolving needs.. Strategies for future-proofing your garage gym organization to accommodate new equipment or evolving needs.
Choose this approach when
- Buy the piece that removes the biggest training bottleneck first, not the piece that looks best in a finished gym photo.
- Check footprint, storage, warranty, return rules, and replacement parts before ordering.
- A cheaper item is not cheaper if it forces a second purchase or blocks the main lift lane.
- You can explain where the item starts, where it goes during the workout, and where it returns afterward.
- The choice improves the main training lane instead of only making the room look more finished.
- The setup still works on a tired day when you are less careful about putting everything back perfectly.
Planning modules to work through
Introduction: The Power of an Organized Garage Gym
- Benefits for safety, efficiency, and workout motivation
- Why a comprehensive checklist is essential for long-term success
Step 1: Declutter, Clean, and Assess Your Space
- Remove all non-gym items and discard unused equipment
- Perform a deep clean of the garage floor and walls
Inventory Your Gear
- List all current gym equipment, noting frequency of use
- Categorize items by type (weights, cardio, accessories)
Measure and Map Your Garage
- Note available floor space, wall space, and ceiling height
- Identify power outlets, windows, and main access points
Step 2: Strategic Layout and Zoning for Optimal Flow
- Define distinct functional zones (e.g., lifting, cardio, stretching)
- Ensure clear pathways and adequate space for exercise movements
Designing Your Workout Zones
- Create dedicated areas for different activities to enhance focus
- Consider equipment proximity to minimize transition time
Terms and fit checks to keep straight
These related ideas tend to appear around this topic. Use them as fit checks, not as a shopping list:
- Garage Gym: confirm that this detail applies to your garage, your equipment, and your training style before treating it as a must-have.
- Home Gym: confirm that this detail applies to your garage, your equipment, and your training style before treating it as a must-have.
- Gym Organization: confirm that this detail applies to your garage, your equipment, and your training style before treating it as a must-have.
- Gym Equipment: confirm that this detail applies to your garage, your equipment, and your training style before treating it as a must-have.
- Storage Ideas: confirm that this detail applies to your garage, your equipment, and your training style before treating it as a must-have.
- Power Rack: confirm that this detail applies to your garage, your equipment, and your training style before treating it as a must-have.
- Squat Rack: confirm that this detail applies to your garage, your equipment, and your training style before treating it as a must-have.
- Wall Storage: confirm that this detail applies to your garage, your equipment, and your training style before treating it as a must-have.
- Weight Plates: confirm that this detail applies to your garage, your equipment, and your training style before treating it as a must-have.
- Olympic Barbell: confirm that this detail applies to your garage, your equipment, and your training style before treating it as a must-have.
Before-and-after layout check
- Measure the clear walking lane with the garage door open and closed.
- Mark the equipment footprint with painter tape, including the space needed to load, unload, and turn around.
- Stand where you will start the workout and make sure the first action is obvious.
- Put the heaviest or most awkward item back in its storage spot three times; if that feels clumsy, move the storage lower or closer.
- Check whether the setup still leaves a simple path for cleaning, parking, trash bins, bikes, or family gear.
- Take one photo from the garage entry and one photo from the rack area; if either view looks blocked, simplify before buying more.
Common questions
What's the best way to start organizing a messy garage gym?
Begin by completely decluttering the space, removing everything that isn't gym-related and discarding unused items. Then, perform a thorough cleaning of the floor and walls before taking a detailed inventory of all your remaining equipment to understand what you need to store efficiently.
How can I maximize space in a small garage gym?
To maximize space, prioritize vertical storage solutions like wall-mounted racks for barbells and plates, and pegboards for smaller accessories. Utilize overhead storage for less frequently used items, and choose multi-functional or foldable equipment whenever possible to free up valuable floor space.
Is DIY storage safe for heavy gym equipment?
DIY storage can be safe for heavy gym equipment if properly designed and constructed with appropriate materials and fasteners. It's crucial to ensure the structure can support the full weight, is securely anchored to studs, and uses strong enough lumber or metal to prevent collapse or failure.
How often should I reorganize my garage gym?
A full reorganization isn't needed frequently, but a routine of daily tidying and weekly wipe-downs is beneficial for maintenance. Reassess your layout and storage solutions every 6-12 months, or whenever you acquire new equipment, to ensure it continues to meet your evolving needs and maintains efficiency.
What are the most common organizational mistakes in a garage gym?
Common mistakes include not utilizing vertical space, failing to categorize equipment, neglecting to plan for workout flow, and inconsistent tidying. Overlooking safety by obstructing pathways or improperly storing heavy items also poses significant risks, making a well-thought-out system crucial for any garage gym.
When to keep it simple
Do not overbuild this page’s recommendation into a full-room remodel if the bottleneck is small. For many garage gyms, the right next move is one clear return spot, one better measurement, or one safer walking lane. Upgrade only after the current setup proves what is actually slowing down the workout.
For a deeper plan, pair this page with the garage gym measurement checklist, the layout cheat sheet, and the organization planner.
Measurement and buying sanity checks
Use these numbers as planning checks, not as live product claims. Final purchases should be verified against the current listing and manufacturer instructions.
- Measure before product: Write down the exact wall width, depth, ceiling height, car-door swing, walking lane, and where the item will reset after a workout.
- Use price bands carefully: Treat price ranges as planning estimates only. Verify current prices, shipping, dimensions, ratings, and return policies on the live listing.
- Keep the lane clear: The best-looking storage is a bad choice if it creates a toe-stub, blocks the car, hides daily gear, or requires moving three items before training.