Use these when the main issue is shadowing around the rack, plates, bench feet, or bar hooks.
Compare options on AmazonGarage Gym Lighting Guide: Bright, Safe, and Useful Training Zones
Better lighting makes a garage gym feel cleaner and safer while helping you see plates, collars, footing, and storage labels.
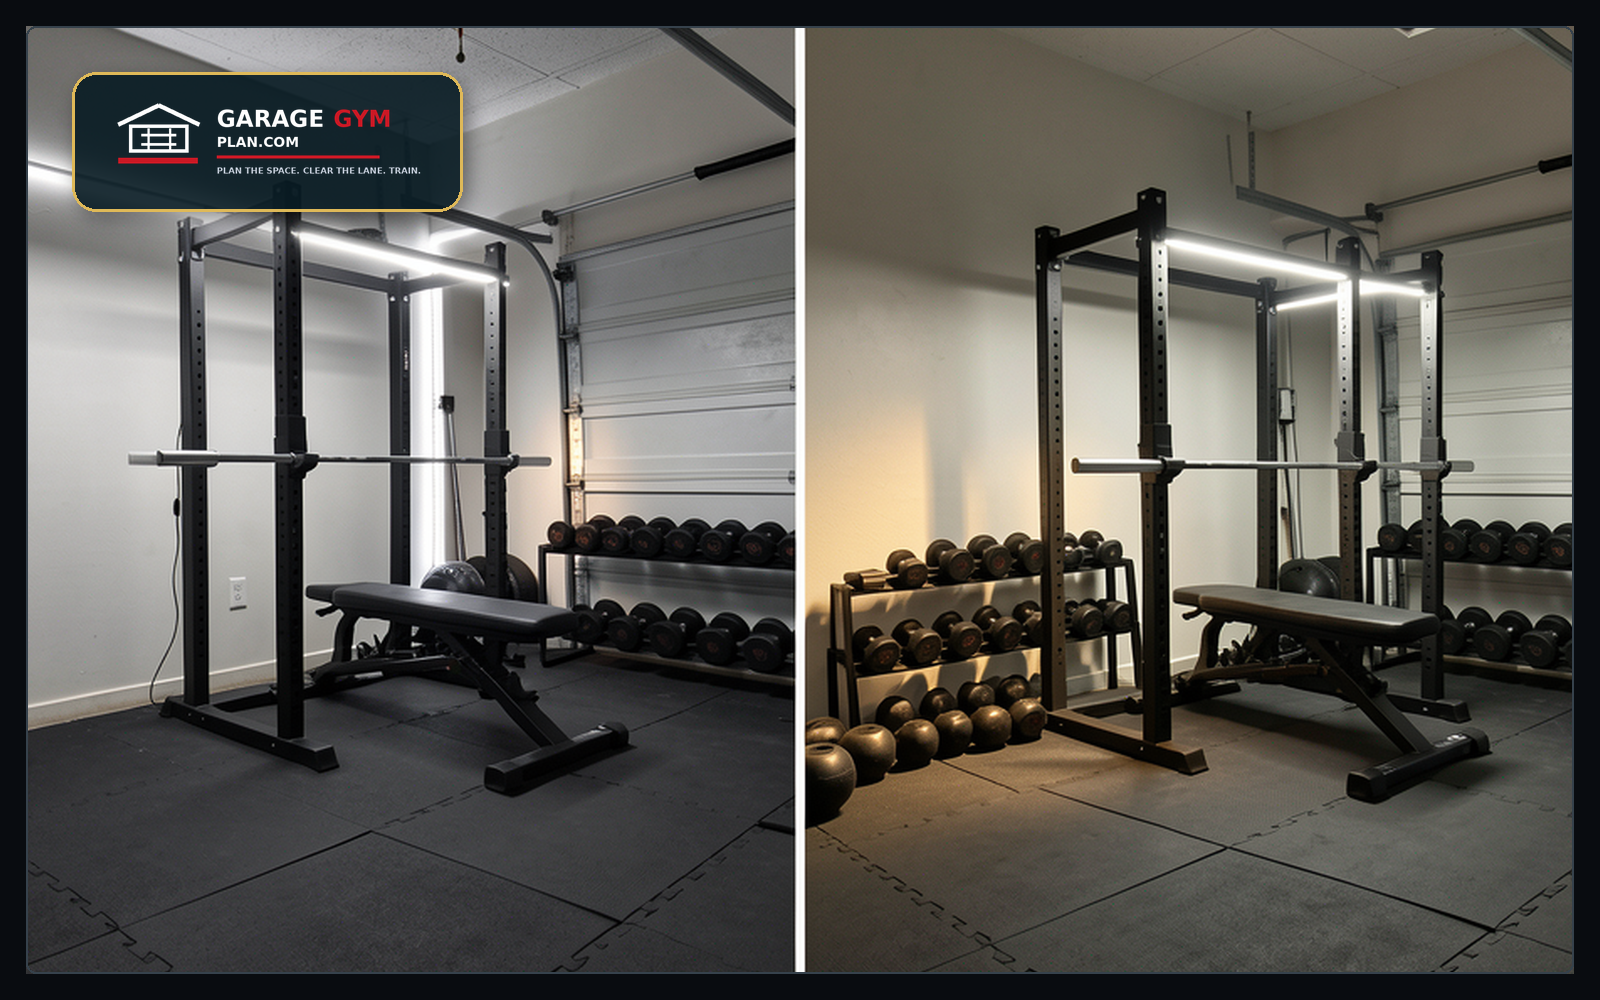
Use this guide if
- Your garage feels dim, shadowy, or hard to use early or late
- Shelves, rails, or openers cast shadows over the rack or floor
- You want the space to feel more like a real gym and less like storage
The planning sequence
- Step 1: Light the rack face, plate storage, and open floor separately when possible
- Step 2: Avoid glare directly in the eyes during benching or floor work
- Step 3: Use task lighting for shelves, tools, and labels
- Step 4: Keep switches or motion sensors easy to reach from the house entry
- Step 5: Check lighting after the car, door, or tall storage is in its normal position
Fast decision ruleBetter lighting makes a garage gym feel cleaner and safer while helping you see plates, collars, footing, and storage labels. If an item makes the main training lane harder to use, it belongs in a different zone or later buying phase.
Lighting choice table by training zone
Choose lighting by the task, not by brightness alone. The rack, floor, mirror, storage, and door areas need different kinds of visibility.
| Zone | Useful light type | Why it helps | Buyer check | Compare |
|---|---|---|---|---|
| Rack and bench | Bright overhead LED shop lights with even spread. | Reduces shadows around hooks, plates, safety arms, and foot position. | Check length, lumens, color temperature, plug-in vs hardwired setup, and mounting hardware. | View options |
| Storage wall | Slim LED bars or task lights aimed at labels and bins. | Makes collars, handles, bands, and small parts easier to find quickly. | Choose fixtures that do not block shelves, pegboards, or garage-door movement. | View options |
| Floor and walking lanes | Diffused fixtures placed away from trip-path glare. | Helps you see mats, plate edges, cords, and wet spots. | Look for low-glare covers and enough coverage at the back of the garage. | Plan first |
| Early morning entry | Motion sensor or switchable task light near the door. | Lets you enter, load plates, and warm up without crossing a dark room. | Confirm sensor range, switch location, and whether it can be disabled during workouts. | Plan first |
Lighting products worth comparing
If the layout is already set, compare fixtures by zone: broad rack lighting, entry-path safety lighting, and focused storage-wall lighting. Check mounting, wiring, return policy, and garage-door clearance before ordering.
Useful near the entry path so you can load plates and move safely before the whole garage is lit.
Compare options on AmazonBest for shelves, labels, pegboards, and accessory zones where overhead fixtures leave dark pockets.
Compare options on AmazonUse these as comparison starting points, not automatic picks. The right fixture depends on the garage door track, outlet location, ceiling height, and where shadows fall during your main lifts.
Printable garage reset system
Garage Gym Reset Kit
Measure the garage, choose the storage path, and turn the plan into a printable checklist before buying more equipment.
See the Garage Gym Reset KitCommon mistakes to avoid
- Adding one bright light that still leaves the rack in shadow
- Forgetting that open garage doors change glare and contrast
- Keeping labels and small accessories in dark corners
Next pages to plan with this
Use these guides to connect the layout decision to measurement, storage, flooring, and buying order.
Garage Gym Lighting Guide: the practical planning layer
Use this section when the basic answer is not enough and you need to decide how the setup should work in a real garage. The goal is not to add more gear; it is to make the garage gym lighting guide choice fit the way you train, park, clean, and move through the space.
Quick rule: Buy the piece that removes the biggest training bottleneck first, not the piece that looks best in a finished gym photo. Check footprint, storage, warranty, return rules, and replacement parts before ordering.
Gaps to solve before you buy or rearrange
- Detailed cost analysis and budgeting tips for different lighting setups. Detailed cost analysis and budgeting tips for different lighting setups
- DIY installation walkthroughs and safety precautions for various fixture types. DIY installation walkthroughs and safety precautions for various fixture types
- The psychological and physiological impact of lighting on workout performance, mood, and motivation. The psychological and physiological impact of lighting on workout performance, mood, and motivation
- Energy efficiency considerations, smart lighting integration, and control systems for home gyms. Energy efficiency considerations, smart lighting integration, and control systems for home gyms
- Strategies for integrating natural light, window treatments, and addressing glare in garage gym environments. Strategies for integrating natural light, window treatments, and addressing glare in garage gym environments
Choose this approach when
- Buy the piece that removes the biggest training bottleneck first, not the piece that looks best in a finished gym photo.
- Check footprint, storage, warranty, return rules, and replacement parts before ordering.
- A cheaper item is not cheaper if it forces a second purchase or blocks the main lift lane.
- You can explain where the item starts, where it goes during the workout, and where it returns afterward.
- The choice improves the main training lane instead of only making the room look more finished.
- The setup still works on a tired day when you are less careful about putting everything back perfectly.
Terms and fit checks to keep straight
These related ideas tend to appear around this topic. Use them as fit checks, not as a shopping list:
- Garage Gym: confirm that this detail applies to your garage, your equipment, and your training style before treating it as a must-have.
- Gym Lighting: confirm that this detail applies to your garage, your equipment, and your training style before treating it as a must-have.
- Garage Lighting: confirm that this detail applies to your garage, your equipment, and your training style before treating it as a must-have.
- Color Temperature: confirm that this detail applies to your garage, your equipment, and your training style before treating it as a must-have.
- Led Lighting: confirm that this detail applies to your garage, your equipment, and your training style before treating it as a must-have.
- Led Lights: confirm that this detail applies to your garage, your equipment, and your training style before treating it as a must-have.
- Hexagon Led: confirm that this detail applies to your garage, your equipment, and your training style before treating it as a must-have.
- Light Fixtures: confirm that this detail applies to your garage, your equipment, and your training style before treating it as a must-have.
- Home Gym: confirm that this detail applies to your garage, your equipment, and your training style before treating it as a must-have.
- Lighting Design: confirm that this detail applies to your garage, your equipment, and your training style before treating it as a must-have.
Before-and-after layout check
- Measure the clear walking lane with the garage door open and closed.
- Mark the equipment footprint with painter tape, including the space needed to load, unload, and turn around.
- Stand where you will start the workout and make sure the first action is obvious.
- Put the heaviest or most awkward item back in its storage spot three times; if that feels clumsy, move the storage lower or closer.
- Check whether the setup still leaves a simple path for cleaning, parking, trash bins, bikes, or family gear.
- Take one photo from the garage entry and one photo from the rack area; if either view looks blocked, simplify before buying more.
When to keep it simple
Do not overbuild this page’s recommendation into a full-room remodel if the bottleneck is small. For many garage gyms, the right next move is one clear return spot, one better measurement, or one safer walking lane. Upgrade only after the current setup proves what is actually slowing down the workout.
For a deeper plan, pair this page with the garage gym measurement checklist, the layout cheat sheet, and the organization planner.
Pass 1 check: Check footprint, storage, warranty, return rules, and replacement parts before ordering. Walk through the setup as if the workout has already started: pick up the item, use it, return it, and then move to the next station. If that movement creates a trip point, a blocked car path, or a piece that never gets returned, the layout needs a smaller and clearer solution.
Pass 2 check: A cheaper item is not cheaper if it forces a second purchase or blocks the main lift lane. Walk through the setup as if the workout has already started: pick up the item, use it, return it, and then move to the next station. If that movement creates a trip point, a blocked car path, or a piece that never gets returned, the layout needs a smaller and clearer solution.
Pass 3 check: Buy the piece that removes the biggest training bottleneck first, not the piece that looks best in a finished gym photo. Walk through the setup as if the workout has already started: pick up the item, use it, return it, and then move to the next station. If that movement creates a trip point, a blocked car path, or a piece that never gets returned, the layout needs a smaller and clearer solution.
Pass 4 check: Check footprint, storage, warranty, return rules, and replacement parts before ordering. Walk through the setup as if the workout has already started: pick up the item, use it, return it, and then move to the next station. If that movement creates a trip point, a blocked car path, or a piece that never gets returned, the layout needs a smaller and clearer solution.
Pass 5 check: A cheaper item is not cheaper if it forces a second purchase or blocks the main lift lane. Walk through the setup as if the workout has already started: pick up the item, use it, return it, and then move to the next station. If that movement creates a trip point, a blocked car path, or a piece that never gets returned, the layout needs a smaller and clearer solution.
Pass 6 check: Buy the piece that removes the biggest training bottleneck first, not the piece that looks best in a finished gym photo. Walk through the setup as if the workout has already started: pick up the item, use it, return it, and then move to the next station. If that movement creates a trip point, a blocked car path, or a piece that never gets returned, the layout needs a smaller and clearer solution.
Pass 7 check: Check footprint, storage, warranty, return rules, and replacement parts before ordering. Walk through the setup as if the workout has already started: pick up the item, use it, return it, and then move to the next station. If that movement creates a trip point, a blocked car path, or a piece that never gets returned, the layout needs a smaller and clearer solution.
Pass 8 check: A cheaper item is not cheaper if it forces a second purchase or blocks the main lift lane. Walk through the setup as if the workout has already started: pick up the item, use it, return it, and then move to the next station. If that movement creates a trip point, a blocked car path, or a piece that never gets returned, the layout needs a smaller and clearer solution.
Pass 9 check: Buy the piece that removes the biggest training bottleneck first, not the piece that looks best in a finished gym photo. Walk through the setup as if the workout has already started: pick up the item, use it, return it, and then move to the next station. If that movement creates a trip point, a blocked car path, or a piece that never gets returned, the layout needs a smaller and clearer solution.
Pass 10 check: Check footprint, storage, warranty, return rules, and replacement parts before ordering. Walk through the setup as if the workout has already started: pick up the item, use it, return it, and then move to the next station. If that movement creates a trip point, a blocked car path, or a piece that never gets returned, the layout needs a smaller and clearer solution.
Pass 11 check: A cheaper item is not cheaper if it forces a second purchase or blocks the main lift lane. Walk through the setup as if the workout has already started: pick up the item, use it, return it, and then move to the next station. If that movement creates a trip point, a blocked car path, or a piece that never gets returned, the layout needs a smaller and clearer solution.
Pass 12 check: Buy the piece that removes the biggest training bottleneck first, not the piece that looks best in a finished gym photo. Walk through the setup as if the workout has already started: pick up the item, use it, return it, and then move to the next station. If that movement creates a trip point, a blocked car path, or a piece that never gets returned, the layout needs a smaller and clearer solution.
Pass 13 check: Check footprint, storage, warranty, return rules, and replacement parts before ordering. Walk through the setup as if the workout has already started: pick up the item, use it, return it, and then move to the next station. If that movement creates a trip point, a blocked car path, or a piece that never gets returned, the layout needs a smaller and clearer solution.
Pass 14 check: A cheaper item is not cheaper if it forces a second purchase or blocks the main lift lane. Walk through the setup as if the workout has already started: pick up the item, use it, return it, and then move to the next station. If that movement creates a trip point, a blocked car path, or a piece that never gets returned, the layout needs a smaller and clearer solution.
Pass 15 check: Buy the piece that removes the biggest training bottleneck first, not the piece that looks best in a finished gym photo. Walk through the setup as if the workout has already started: pick up the item, use it, return it, and then move to the next station. If that movement creates a trip point, a blocked car path, or a piece that never gets returned, the layout needs a smaller and clearer solution.
Pass 16 check: Check footprint, storage, warranty, return rules, and replacement parts before ordering. Walk through the setup as if the workout has already started: pick up the item, use it, return it, and then move to the next station. If that movement creates a trip point, a blocked car path, or a piece that never gets returned, the layout needs a smaller and clearer solution.
Pass 17 check: A cheaper item is not cheaper if it forces a second purchase or blocks the main lift lane. Walk through the setup as if the workout has already started: pick up the item, use it, return it, and then move to the next station. If that movement creates a trip point, a blocked car path, or a piece that never gets returned, the layout needs a smaller and clearer solution.
Pass 18 check: Buy the piece that removes the biggest training bottleneck first, not the piece that looks best in a finished gym photo. Walk through the setup as if the workout has already started: pick up the item, use it, return it, and then move to the next station. If that movement creates a trip point, a blocked car path, or a piece that never gets returned, the layout needs a smaller and clearer solution.
Pass 19 check: Check footprint, storage, warranty, return rules, and replacement parts before ordering. Walk through the setup as if the workout has already started: pick up the item, use it, return it, and then move to the next station. If that movement creates a trip point, a blocked car path, or a piece that never gets returned, the layout needs a smaller and clearer solution.
Lighting checks before buying fixtures
Use these numbers as planning checks, not as live product claims. Final purchases should be verified against the current listing and manufacturer instructions.
- Measure the task: Identify dark zones: rack uprights, dumbbell labels, floor seams, doorway steps, and wall storage. Add light where decisions happen, not just where the room looks dim.
- Garage conflict: Check garage-door opener clearance, ceiling racks, extension cords, and whether fixtures cast shadows over the rack or bench.
- Buying check: Verify fixture length, plug/wire type, color temperature, mounting hardware, and whether it is rated for garage temperature/moisture conditions.