
Half Garage Gym Ideas for Training Without Losing the Whole Garage
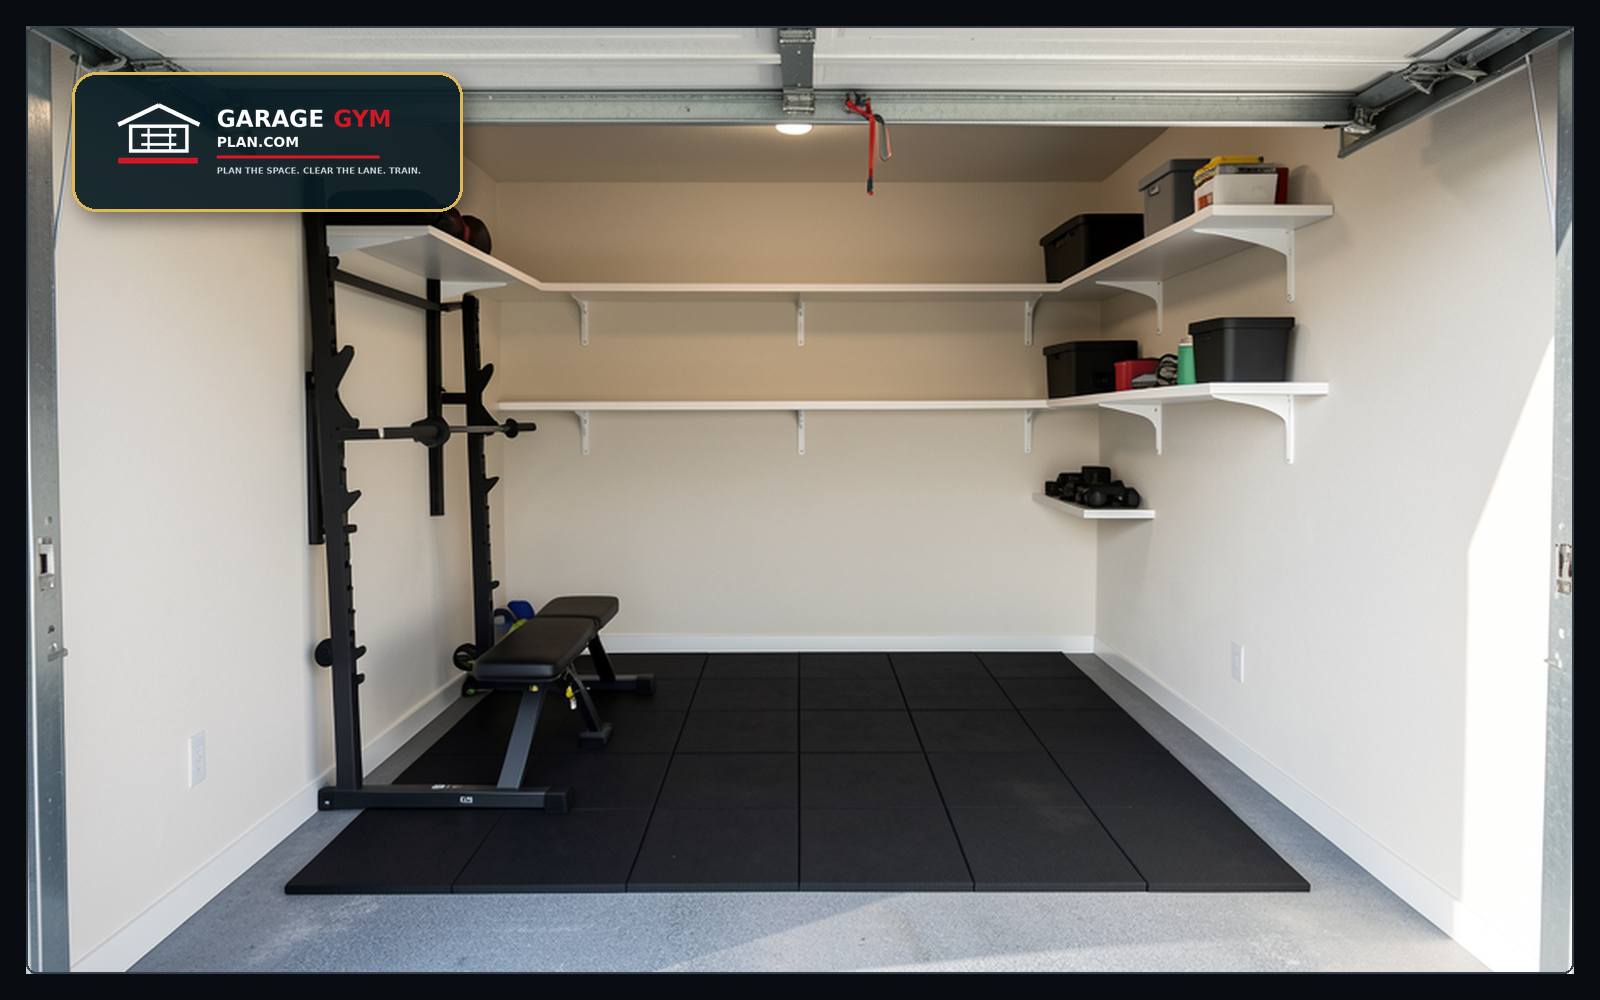
A half garage gym is for people who want the freedom to train at home without giving up every other job the garage has.
The design problem is simple: one side of the garage has to become a reliable training zone while the other side may still need to park a car, hold tools, store bikes, or handle seasonal items.
The best half-garage layouts make the boundary obvious. They protect the training rectangle, keep storage from spreading, and avoid equipment that only works when the garage is perfectly empty.
The best half-garage layout starts with a boundary
Mark the half of the garage that belongs to training before placing equipment. Use tape, a mat edge, shelving, or a flooring transition to make the boundary visible.
If the boundary is vague, storage will creep into the gym and gym gear will creep into the car lane. The page can look organized in photos while being frustrating in daily use.
Four half garage gym layouts
Side-wall strength lane: rack or folding rack on the long wall with plates and bar storage nearby.
Back-wall training bay: rack, bench, or dumbbell zone across the back wall while the car pulls in short of the training boundary.
Corner compact setup: bench, adjustable dumbbells, kettlebells, and bands in one corner for easier workouts.
Rolling equipment setup: movable bench, dumbbell stand, sled substitute, or conditioning tools that reset quickly after use.
How to keep the car side usable
Measure the car with mirrors, door swing, bumper line, and the walking path to the house.
Avoid shelves or wall hooks that project into the door swing.
Do not store plates, barbells, or benches where the driver has to step every day.
Check the garage door path and opener rail before putting a rack near the center or back of the garage.
Storage rules for half garage gyms
Keep gym storage inside the training half, not scattered around the garage.
Use vertical storage for bars, bands, and handles.
Store plates close to the rack but outside the loading stance.
Use labeled bins or shelves for non-gym garage items so they do not invade the training side.
Leave one clear emergency path to panels, doors, utilities, and exits.
Half garage gym equipment sequence
First: flooring boundary and measurement pass.
Second: one main strength or conditioning anchor.
Third: wall storage that keeps the reset easy.
Fourth: accessories that earn their footprint.
Last: specialty machines only if the half-garage boundary still works after several weeks.
Half-garage layout scorecard
| Question | PASS | REDESIGN signal | Compare |
|---|---|---|---|
| Can the car door open normally? | Driver can enter and exit without stepping over gym gear | Bench, plates, hooks, or shelves interfere with doors | View options |
| Can the rack or bench be used without moving storage? | Workout starts with minimal setup | Every workout begins by clearing bins or tools | View options |
| Is the walking path clear? | House-to-car route stays open | The path crosses barbell sleeves or plates | View options |
| Does storage have a boundary? | Gym and garage items have separate zones | Seasonal storage creeps onto mats | Plan first |
Half garage gym ideas that preserve the other half
A half garage gym needs a stronger boundary than a dedicated room. The car side, tool side, storage side, and walking path should remain visible even when the workout is in progress.
Good ideas include a mat boundary, shallow wall storage, a rack location that does not fight the door track, and a bench parking plan. Bad ideas are usually the ones that require the non-gym half to become temporary storage every session.
How to stop storage creep
Give non-gym items a labeled shelf or wall zone away from the training rectangle. If holiday bins, tools, bikes, or boxes can drift onto the mat, the gym will feel smaller every month.
Keep the training side resettable: bars vertical or wall-mounted, plates close to the rack, bands on hooks, and the bench in a defined parking spot.
Use this in the Garage Gym Planning System
A half garage gym needs a stronger plan than a dedicated room because every mistake creates daily friction. Use the Planning System to score the split, storage wall, car lane, and buying order before committing to bulky equipment.
- Best next step: measure the room, score the fit, and place the setup into a buy-now or buy-later sequence.
- Planning value: fewer wrong purchases, faster setup, and a gym that stays easier to use.
Related planning guides
Half Garage Gym Ideas: the practical planning layer
Use this section when the basic answer is not enough and you need to decide how the setup should work in a real garage. The goal is not to add more gear; it is to make the half garage gym ideas choice fit the way you train, park, clean, and move through the space.
Gaps to solve before you buy or rearrange
- Budget-friendly partial garage gym setups and equipment recommendations. Budget-friendly partial garage gym setups and equipment recommendations
- Specific flooring solutions and protection strategies for a half-garage gym. Specific flooring solutions and protection strategies for a half-garage gym
- Integrating smart storage and organization for shared garage spaces. Integrating smart storage and organization for shared garage spaces
- Lighting, ventilation, and climate control considerations for a dedicated workout zone. Lighting, ventilation, and climate control considerations for a dedicated workout zone
- DIY projects and customization tips for building a unique half-garage fitness area. DIY projects and customization tips for building a unique half-garage fitness area
Choose this approach when
- Buy the piece that removes the biggest training bottleneck first, not the piece that looks best in a finished gym photo.
- Check footprint, storage, warranty, return rules, and replacement parts before ordering.
- A cheaper item is not cheaper if it forces a second purchase or blocks the main lift lane.
- You can explain where the item starts, where it goes during the workout, and where it returns afterward.
- The choice improves the main training lane instead of only making the room look more finished.
- The setup still works on a tired day when you are less careful about putting everything back perfectly.
Terms and fit checks to keep straight
These related ideas tend to appear around this topic. Use them as fit checks, not as a shopping list:
- Half Garage: confirm that this detail applies to your garage, your equipment, and your training style before treating it as a must-have.
- Gym Ideas: confirm that this detail applies to your garage, your equipment, and your training style before treating it as a must-have.
- Garage Gym: confirm that this detail applies to your garage, your equipment, and your training style before treating it as a must-have.
- Home Gym: confirm that this detail applies to your garage, your equipment, and your training style before treating it as a must-have.
- Garage Home: confirm that this detail applies to your garage, your equipment, and your training style before treating it as a must-have.
- Half Gym: confirm that this detail applies to your garage, your equipment, and your training style before treating it as a must-have.
- Garage Ideas: confirm that this detail applies to your garage, your equipment, and your training style before treating it as a must-have.
- Folding Treadmill: confirm that this detail applies to your garage, your equipment, and your training style before treating it as a must-have.
- Exercise Bike: confirm that this detail applies to your garage, your equipment, and your training style before treating it as a must-have.
- [No Data 10]: confirm that this detail applies to your garage, your equipment, and your training style before treating it as a must-have.
Before-and-after layout check
- Measure the clear walking lane with the garage door open and closed.
- Mark the equipment footprint with painter tape, including the space needed to load, unload, and turn around.
- Stand where you will start the workout and make sure the first action is obvious.
- Put the heaviest or most awkward item back in its storage spot three times; if that feels clumsy, move the storage lower or closer.
- Check whether the setup still leaves a simple path for cleaning, parking, trash bins, bikes, or family gear.
- Take one photo from the garage entry and one photo from the rack area; if either view looks blocked, simplify before buying more.
When to keep it simple
Do not overbuild this page’s recommendation into a full-room remodel if the bottleneck is small. For many garage gyms, the right next move is one clear return spot, one better measurement, or one safer walking lane. Upgrade only after the current setup proves what is actually slowing down the workout.
For a deeper plan, pair this page with the garage gym measurement checklist, the layout cheat sheet, and the organization planner.
Pass 1 check: Check footprint, storage, warranty, return rules, and replacement parts before ordering. Walk through the setup as if the workout has already started: pick up the item, use it, return it, and then move to the next station. If that movement creates a trip point, a blocked car path, or a piece that never gets returned, the layout needs a smaller and clearer solution.
Pass 2 check: A cheaper item is not cheaper if it forces a second purchase or blocks the main lift lane. Walk through the setup as if the workout has already started: pick up the item, use it, return it, and then move to the next station. If that movement creates a trip point, a blocked car path, or a piece that never gets returned, the layout needs a smaller and clearer solution.
Pass 3 check: Buy the piece that removes the biggest training bottleneck first, not the piece that looks best in a finished gym photo. Walk through the setup as if the workout has already started: pick up the item, use it, return it, and then move to the next station. If that movement creates a trip point, a blocked car path, or a piece that never gets returned, the layout needs a smaller and clearer solution.
Pass 4 check: Check footprint, storage, warranty, return rules, and replacement parts before ordering. Walk through the setup as if the workout has already started: pick up the item, use it, return it, and then move to the next station. If that movement creates a trip point, a blocked car path, or a piece that never gets returned, the layout needs a smaller and clearer solution.
Pass 5 check: A cheaper item is not cheaper if it forces a second purchase or blocks the main lift lane. Walk through the setup as if the workout has already started: pick up the item, use it, return it, and then move to the next station. If that movement creates a trip point, a blocked car path, or a piece that never gets returned, the layout needs a smaller and clearer solution.
Pass 6 check: Buy the piece that removes the biggest training bottleneck first, not the piece that looks best in a finished gym photo. Walk through the setup as if the workout has already started: pick up the item, use it, return it, and then move to the next station. If that movement creates a trip point, a blocked car path, or a piece that never gets returned, the layout needs a smaller and clearer solution.
Pass 7 check: Check footprint, storage, warranty, return rules, and replacement parts before ordering. Walk through the setup as if the workout has already started: pick up the item, use it, return it, and then move to the next station. If that movement creates a trip point, a blocked car path, or a piece that never gets returned, the layout needs a smaller and clearer solution.
Pass 8 check: A cheaper item is not cheaper if it forces a second purchase or blocks the main lift lane. Walk through the setup as if the workout has already started: pick up the item, use it, return it, and then move to the next station. If that movement creates a trip point, a blocked car path, or a piece that never gets returned, the layout needs a smaller and clearer solution.
Pass 9 check: Buy the piece that removes the biggest training bottleneck first, not the piece that looks best in a finished gym photo. Walk through the setup as if the workout has already started: pick up the item, use it, return it, and then move to the next station. If that movement creates a trip point, a blocked car path, or a piece that never gets returned, the layout needs a smaller and clearer solution.
Pass 10 check: Check footprint, storage, warranty, return rules, and replacement parts before ordering. Walk through the setup as if the workout has already started: pick up the item, use it, return it, and then move to the next station. If that movement creates a trip point, a blocked car path, or a piece that never gets returned, the layout needs a smaller and clearer solution.
Pass 11 check: A cheaper item is not cheaper if it forces a second purchase or blocks the main lift lane. Walk through the setup as if the workout has already started: pick up the item, use it, return it, and then move to the next station. If that movement creates a trip point, a blocked car path, or a piece that never gets returned, the layout needs a smaller and clearer solution.
Pass 12 check: Buy the piece that removes the biggest training bottleneck first, not the piece that looks best in a finished gym photo. Walk through the setup as if the workout has already started: pick up the item, use it, return it, and then move to the next station. If that movement creates a trip point, a blocked car path, or a piece that never gets returned, the layout needs a smaller and clearer solution.
Pass 13 check: Check footprint, storage, warranty, return rules, and replacement parts before ordering. Walk through the setup as if the workout has already started: pick up the item, use it, return it, and then move to the next station. If that movement creates a trip point, a blocked car path, or a piece that never gets returned, the layout needs a smaller and clearer solution.
Pass 14 check: A cheaper item is not cheaper if it forces a second purchase or blocks the main lift lane. Walk through the setup as if the workout has already started: pick up the item, use it, return it, and then move to the next station. If that movement creates a trip point, a blocked car path, or a piece that never gets returned, the layout needs a smaller and clearer solution.
Pass 15 check: Buy the piece that removes the biggest training bottleneck first, not the piece that looks best in a finished gym photo. Walk through the setup as if the workout has already started: pick up the item, use it, return it, and then move to the next station. If that movement creates a trip point, a blocked car path, or a piece that never gets returned, the layout needs a smaller and clearer solution.
Pass 16 check: Check footprint, storage, warranty, return rules, and replacement parts before ordering. Walk through the setup as if the workout has already started: pick up the item, use it, return it, and then move to the next station. If that movement creates a trip point, a blocked car path, or a piece that never gets returned, the layout needs a smaller and clearer solution.
Pass 17 check: A cheaper item is not cheaper if it forces a second purchase or blocks the main lift lane. Walk through the setup as if the workout has already started: pick up the item, use it, return it, and then move to the next station. If that movement creates a trip point, a blocked car path, or a piece that never gets returned, the layout needs a smaller and clearer solution.
Pass 18 check: Buy the piece that removes the biggest training bottleneck first, not the piece that looks best in a finished gym photo. Walk through the setup as if the workout has already started: pick up the item, use it, return it, and then move to the next station. If that movement creates a trip point, a blocked car path, or a piece that never gets returned, the layout needs a smaller and clearer solution.
Pass 19 check: Check footprint, storage, warranty, return rules, and replacement parts before ordering. Walk through the setup as if the workout has already started: pick up the item, use it, return it, and then move to the next station. If that movement creates a trip point, a blocked car path, or a piece that never gets returned, the layout needs a smaller and clearer solution.
Garage Gym Reset Kit
Measure the garage, choose the storage path, and turn the plan into a printable checklist before buying more equipment.
See the Garage Gym Reset KitMeasurement and buying sanity checks
Use these numbers as planning checks, not as live product claims. Final purchases should be verified against the current listing and manufacturer instructions.
- Measure before product: Write down the exact wall width, depth, ceiling height, car-door swing, walking lane, and where the item will reset after a workout.
- Use price bands carefully: Treat price ranges as planning estimates only. Verify current prices, shipping, dimensions, ratings, and return policies on the live listing.
- Keep the lane clear: The best-looking storage is a bad choice if it creates a toe-stub, blocks the car, hides daily gear, or requires moving three items before training.