
Garage Gym Flooring Thickness Guide: Match Rubber to Training Use
Flooring thickness should match the training zone, not just the product category. A rack lane, dumbbell corner, and parking path can need different treatment.
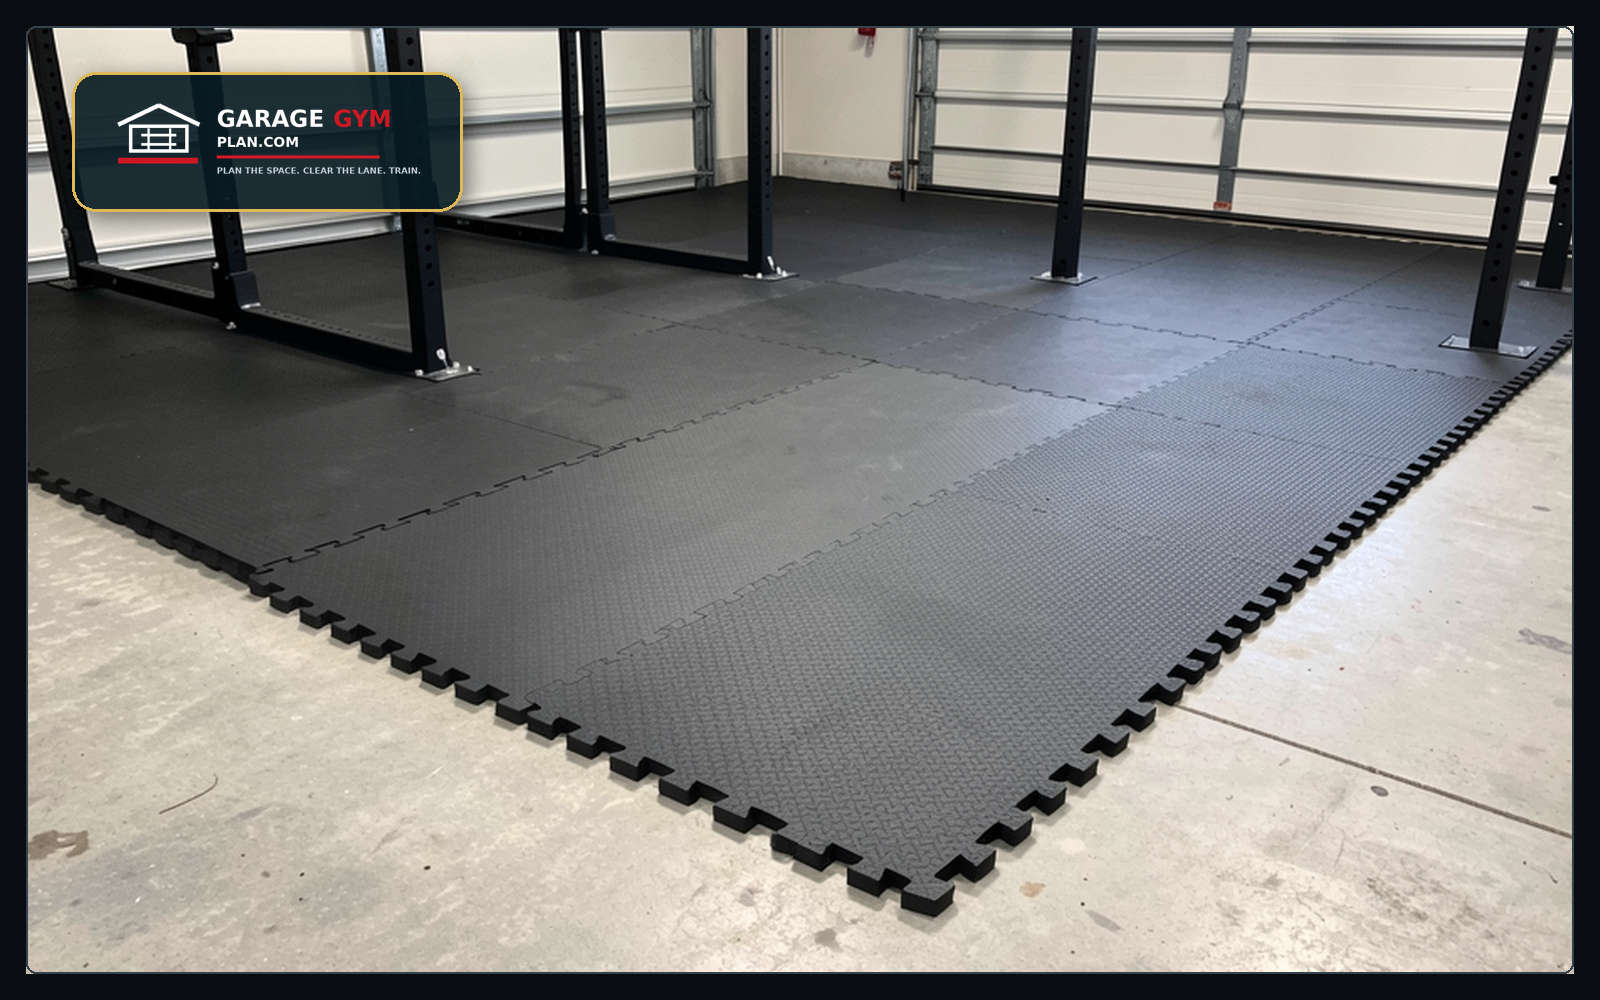
Use this guide if
- You are comparing mats, rolls, tiles, platforms, or spot protection
- You need to avoid awkward height transitions and tripping edges
- You want enough protection without making the whole garage harder to use
The planning sequence
- Step 1: Map the heaviest impact zone first
- Step 2: Check whether the rack, bench, and plates will sit on one continuous level
- Step 3: Use thinner or removable protection where the car still parks
- Step 4: Avoid loose edges in walking and plate-loading paths
- Step 5: Re-check door clearance after adding flooring height
Common mistakes to avoid
- Treating the whole garage as one flooring problem
- Forgetting that mats raise rack and opener clearance needs
- Using small loose tiles where plates and benches roll
What to compare before you buy
Use thinner rubber for general training and thicker rubber where dropping, heavy dumbbells, or rough concrete matter. Do not add thickness that creates a door or rack-leveling problem.
| Product path | Use it when | Check before ordering | Compare |
|---|---|---|---|
| 3/8 Inch Rubber Gym Flooring | Best when it solves choosing flooring thickness from price alone instead of use, seams, smell, and clearance without crowding the training lane. | Verify size, mounting/support, capacity language, and return rules on the current product page. | Plan first |
| 1/2 Inch Rubber Gym Mats | Best when it solves choosing flooring thickness from price alone instead of use, seams, smell, and clearance without crowding the training lane. | Verify size, mounting/support, capacity language, and return rules on the current product page. | Plan first |
| Horse Stall Mats | Best when it solves choosing flooring thickness from price alone instead of use, seams, smell, and clearance without crowding the training lane. | Verify size, mounting/support, capacity language, and return rules on the current product page. | View options |
- Measure door clearance and rack leveling before adding thick mats.
- Use thicker protection under repeated impact zones instead of overbuilding every corner.
- Check material, thickness tolerance, odor reviews, and shipping weight.
Garage Gym Plan may earn from qualifying retailer links. Search links are starting points, not final endorsements; verify the current product specs and installation instructions before buying.
Garage Gym Reset Kit
Measure the garage, choose the storage path, and turn the plan into a printable checklist before buying more equipment.
See the Garage Gym Reset KitTrust check for this decision
The safest choice is the one that fits your measured room and the manufacturer’s current installation requirements. Do not rely on a category name alone. Match the product dimensions to your rack zone, wall structure, walking lane, and storage reset routine.
Before checkout, compare the product page against your garage notes: clearance, mounting surface, weight capacity language, included hardware, delivery weight, and return window. If any of those details are unclear, choose the more conservative option or keep planning with the Garage Gym Reset Kit.
Next pages to plan with this
Use these guides to connect the layout decision to measurement, storage, flooring, and buying order.
How to use this flooring thickness page
Start with the real room: measure the space, mark the training lane, then choose the setup changes that make the next workout easier. For this topic, the useful signals are subfloor protection, deadlift noise, stall mat thickness, tile height, and transition edges. Focus on details that change what to buy, measure, move, install, or avoid.
The practical standard is simple: know what to buy first, what to delay, what to measure twice, and what could create a safety or reset problem. That keeps the plan useful without turning it into a stuffed list of every possible product or keyword variation.
Decision checks before buying
| Check | Why it matters | What to do | Compare |
|---|---|---|---|
| Measure the real usable area | Garage walls, door tracks, slopes, cars, shelves, and stored items shrink the room. | Use tape on the floor and leave the walking lane visible. | View options |
| Match the choice to training style | A lifter, a circuit user, and a family gym need different defaults. | Pick the setup that protects the main workout instead of the setup with the most features. | Plan first |
| Plan the reset | Messy rooms become harder to train in and harder to evaluate later. | Give each item a home that can be reached after a tired session. | Plan first |
| Check safety and maintenance | Bolts, wall mounts, rubber edges, cords, and clearance problems show up after use. | Recheck the setup after the first few workouts and after seasonal garage changes. | Plan first |
Good fit / bad fit examples
A good fit is a layout or product choice that makes the most common workout easier without adding daily friction. It keeps heavy items close to where they are used, preserves the walking lane, and makes cleanup obvious. In a small space, that usually means fewer large pieces and more careful placement. In a larger garage, it means avoiding the temptation to scatter equipment across every empty wall.
A bad fit usually looks impressive for a photo but fails during a normal week. It may block the car path, force plate changes into a narrow lane, put frequently used items behind rarely used items, or require a full room reset before every workout. Seeing those tradeoffs helps you avoid impressive-looking setups that make normal workouts harder.
What to test after setup
- Run one normal workout and note every time you step around equipment.
- Load and unload a bar or handle without moving unrelated items.
- Park the bench, plates, handles, mats, or accessories in their intended home.
- Open the garage door, vehicle door, cabinet, or storage bin that sits near the training area.
- Check whether the room can be reset in less than five minutes.
If those checks fail, the fix is usually layout order, not another product. Move the most-used pieces first, reduce duplicate storage, and keep the open training lane easier to see than the gear collection.
Use this as your baseline before buying
Use this section to set a simple baseline before spending money: compare the table, note the biggest mistake to avoid, and choose the next physical move in the garage.
Add more detail only when it changes a real choice, such as a measurement, installation constraint, price range, product fit issue, safety limit, or before-and-after layout note.
What makes the advice trustworthy
Trust comes from observable constraints: the space limitation, equipment conflict, maintenance issue, or safety tradeoff that changes the recommendation. Generic advice such as “choose what works for you” is not enough. Useful advice explains why one choice fits a narrow garage, why another choice fits a shared garage, and why another choice should wait until the setup has been tested for a few weeks.
Specific reasoning keeps the plan practical: measure the lane, protect the wall, keep the reset easy, and avoid buying gear that creates more decisions than it solves.
Simple upgrade order
Start with the constraint that blocks training most often. If the problem is space, remove or fold one large item before buying another rack, shelf, or stand. If the problem is setup time, move the most-used items into the first reach zone. If the problem is noise, floor protection, or safety, fix that before adding specialty gear. If the problem is clutter, create a reset path before adding more storage products.
The best upgrade is the one that makes next week’s workouts easier to complete. A page that teaches this order is more useful than a page that simply lists more products.
Details to collect before you buy
Before buying, collect the details that change the decision: room measurements, product dimensions, price range, installation limits, common mistakes from similar layouts, and photos or diagrams if they clarify the setup.
If a detail does not change what you buy, measure, move, install, or avoid, it should not distract from the decision path.
Check your garage against three scenarios
Run the advice against three common situations: an empty garage, a messy working gym, and a shared space with cars, storage bins, kids, or tools.
Each scenario should lead to a clear first action without requiring you to read the whole page from top to bottom.
Final room check
The final check is whether the advice can be tested in the room. You should be able to tape a boundary on the floor, move one item, compare two storage choices, or delay a purchase because the tradeoff is clearer.
If the same action appears three different ways, simplify. If the page does not create a physical next step, look for a more specific measurement, constraint, or example.
Quick before-and-after test
Take one before photo from the garage door and one from the main training position. After changing the setup, take the same two photos again. The improvement should be visible: fewer loose items on the floor, a clearer lifting lane, easier access to the main equipment, and less visual clutter around the storage wall. If the photo looks cleaner but the workout still takes longer to start, the layout is not fixed yet.
This photo test is useful because it catches problems a checklist can miss: blocked paths, crowded corners, wall storage placed too high, mats that shifted, and gear that looks organized but is still hard to use.
When to stop adding
Stop adding gear or storage when the next addition does not change a real decision. In the room, that means the setup already supports the main workout and can be reset quickly. In the guide, that means the answer, comparison, warning, and next step are already clear. More detail should come from evidence, not from repeating the topic in a new heading.
That rule keeps the setup practical while leaving room for real product examples, measurements, images, and questions that matter later.
One concrete example beats a broad rule
Use one or two concrete examples instead of a broad rule when the decision is still unclear. Good examples include a room size, rack depth, mat thickness, doorway limit, vehicle-sharing constraint, product price range, or setup mistake that created extra work.
If an example cannot change what you buy, measure, move, or avoid, leave it out.
Keep the next action obvious
If the answer feels buried, return to the first physical move: measure the space, move one item, compare the two most likely options, or wait until a real constraint appears.
The goal is a garage that is easier to train in, not a longer list of products or rules.
Flooring measurement and budget sanity checks
Use these numbers as planning checks, not as live product claims. Final purchases should be verified against the current listing and manufacturer instructions.
- Thickness shorthand: Common garage-gym rubber options include thin rolls or tiles for light work, 3/8 in mats/tiles for general training, and 3/4 in stall-mat-style pieces for heavier lifting zones. Match the floor to the drop risk, not just the look.
- Planning price band: Use a rough planning band of about $1.50–$6.00 per sq ft for rubber flooring categories before shipping/adhesive/transition strips. Verify current product specs before buying.
- Fit check: Confirm door clearance, floor slope, seams, moisture, and whether the product can handle car tires if the garage is still shared.