
Garage Gym Measurement Checklist: What to Measure Before You Buy Equipment
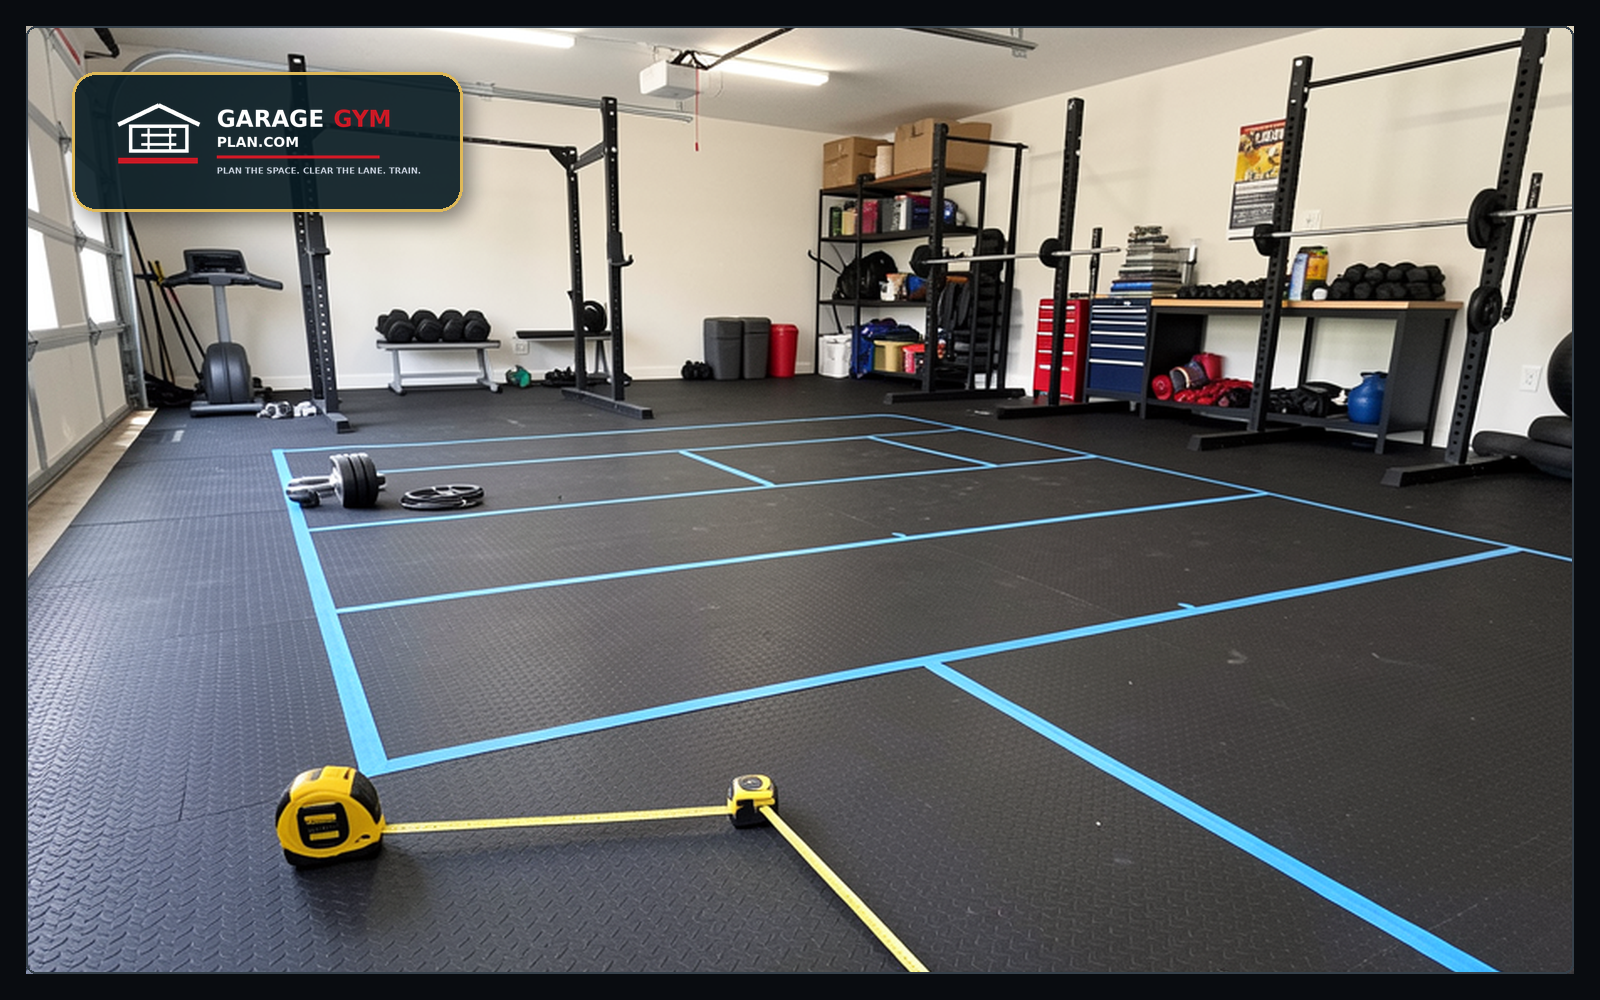
Before you buy a rack, flooring, storage system, bench, or barbell, measure the garage like it is part of the equipment.
A garage gym does not usually fail because the idea is bad. It fails because one piece of gear almost fits. The rack is too tall for the door track. The barbell loads too close to the wall. The bench blocks the walking lane. The stall mats cover less floor than expected. The car still fits, but the driver door no longer opens comfortably.
Use this checklist before buying anything large. The goal is simple: protect the freedom to train at home without wasting money on gear that makes the garage harder to use.
Quick checklist: what to measure first
| Area | What to measure | Why it matters | Compare |
|---|---|---|---|
| Room size | Wall-to-wall width and depth | Shows the real layout box you are working inside | Plan first |
| Ceiling height | Lowest usable height, not just the highest point | Racks, pull-up bars, overhead lifts, and garage tracks can conflict | View options |
| Garage door path | Door tracks, opener, rails, and raised-door position | A rack can fit the ceiling but still hit the garage door path | View options |
| Car lane | Car footprint, door swing, bumper line, and walking path | Prevents a gym layout that makes parking annoying | Plan first |
| Rack/barbell zone | Rack depth, bar length, side-loading room, front/back space | Prevents tight loading and awkward lifting paths | View options |
| Flooring zone | Length, width, mat/tile size, transition points | Helps estimate material quantity and avoid uncovered gaps | Plan first |
| Storage walls | Studs/structure, wall height, walking clearance | Keeps hooks, bars, and shelves out of the training lane | Plan first |
| Obstructions | Steps, outlets, panels, water heater, slope, cabinets | Prevents “almost fits” surprises | Plan first |
If you only have time for one pass, measure the training rectangle first: the space where the rack, barbell, bench, and walking lane all need to coexist.
Start with the empty-room box
Write down the garage as a simple box before placing equipment. Measure total inside width, total inside depth, lowest ceiling height, permanent shelves, steps, water heater space, outlets, side doors, windows, utility panels, door sensors, and the exact path where the garage door moves.
Do not use the advertised garage size alone. A “one-car garage” or “two-car garage” label does not tell you where the tracks, steps, shelves, or door opener sit. A helpful first drawing is just a rectangle with fixed obstacles blocked out.
Measure ceiling height in the worst spot
Ceiling height is not one number if the garage has tracks, openers, beams, lights, storage racks, or sloped areas.
- Floor to ceiling at the rack location.
- Floor to bottom of garage door track.
- Floor to bottom of opener rail or motor housing.
- Floor to bottom of overhead storage, lights, or beams.
- Clearance when the garage door is open.
This matters most if you want a power rack, pull-up bar, wall-mounted rack, overhead press area, or tall storage. Treat online dimensions as planning ranges, then verify against the equipment specs and your actual garage.
Build the rack and barbell rectangle
A rack is not just the rack footprint. The real footprint includes the barbell, plates, bench movement, and the space your body needs to load and lift.
- Rack width, depth, and height.
- Full barbell length.
- Side-loading space on both sleeves.
- Front space for bench setup, walkout, or accessories.
- Bench length and the path needed to move it in and out.
Many garage-gym layouts feel fine until plate loading starts. If the bar zone is tight, mark it as TIGHT, not PASS.
PASS / TIGHT / REDESIGN rack check
| Result | What it means | What to do next |
|---|---|---|
| PASS | You can load the bar, move the bench, walk around the rack, and avoid door-track conflicts | Proceed to product-specific spec checks |
| TIGHT | The equipment may fit, but loading, walking, parking, or bench movement will be annoying | Consider a folding rack, shorter depth, different orientation, or clearer storage |
| REDESIGN | The bar, rack, ceiling, garage door, car, or walking path conflicts with normal use | Change the layout before buying |
Measure the car lane if the garage still has to park a car
If a car still parks inside, measure the garage as two systems: the training zone and the parking zone.
- Car width including mirrors.
- Car length.
- Driver-side and passenger-side door swing.
- Walking path from house door to car.
- Bumper line with the garage door closed.
- Whether folded racks, wall storage, or floor storage project into the car path.
Do not only check whether the car technically fits. Check whether the car is still pleasant to use. If the gym makes parking stressful every day, the layout will lose.
Measure flooring as zones, not just total square feet
Garage gym flooring should match what happens in each part of the room. Measure the full floor, dedicated lifting zone, rack platform or mat zone, walkway, tire path if a car still parks inside, door thresholds, concrete cracks, slope, drainage, and transition points.
You may not need to cover every inch immediately, but you do need to protect the lifting area, avoid trip edges, and account for the way mats or tiles fit the actual dimensions.
Mark storage after the training lane is safe
Storage should support the workout, not steal the room the workout needs. Measure available wall width, usable mounting height, distance from wall hooks or shelves to the walking lane, barbell and plate storage footprints, dumbbell or kettlebell rack depth, and door swing near storage.
Plan the training lane first, then storage. Otherwise the garage can look organized while still forcing you to step around plates, bars, or bins during every workout.
The obstruction list most people forget
- Electrical panel.
- Water heater, furnace, or utility equipment.
- Steps into the house.
- Side door and windows.
- Garage door sensors and opener rail.
- Ceiling lights and overhead shelves.
- Hose bibs, drains, trash bins, bikes, tools, and seasonal storage.
One fixed obstruction can decide where the rack, storage wall, flooring boundary, or car lane has to go.
A simple order for measuring your garage gym
- Draw the full garage rectangle.
- Mark fixed obstacles.
- Mark the car lane, if needed.
- Mark the rack/barbell rectangle.
- Mark the bench and walking path.
- Mark the flooring zone.
- Mark storage only after the workout path is clear.
- Label each area PASS, TIGHT, or REDESIGN.
- Compare the layout to actual equipment specs before buying.
- Save a copy of the plan before changing the garage.
Download the garage gym measurement checklist
Use the printable checklist to measure your garage before buying the expensive stuff. It should include room dimensions, ceiling and door-track clearance, rack/barbell clearance, bench movement, car lane and door swing, flooring quantity, wall/storage zones, obstruction log, and a PASS/TIGHT/REDESIGN score.
Want the full planning workflow? Open the Garage Gym Planning System. It adds layout templates, a budget planner, flooring calculator, shopping shortlist, storage scorecard, and buying sequence so the garage supports training instead of becoming another clutter project.
Related planning guides
- Garage gym layout cheat sheet
- Garage gym organization checklist
- Small garage gym storage ideas
- Wall storage for garage gym accessories
- Garage gym storage systems
Garage Gym Measurement Checklist: the practical planning layer
Use this section when the basic answer is not enough and you need to decide how the setup should work in a real garage. The goal is not to add more gear; it is to make the garage gym measurement checklist choice fit the way you train, park, clean, and move through the space.
Gaps to solve before you buy or rearrange
- Specific clearance requirements and safety zones around different types of equipment (e.g., barbell path for deadlifts, space for spotting, kettlebell swings).. Specific clearance requirements and safety zones around different types of equipment (e.g., barbell path for deadlifts, space for spotting, kettlebell swings).
- Detailed ceiling height calculations for overhead presses, pull-ups, and specific power racks, including recommendations for various exercise needs.. Detailed ceiling height calculations for overhead presses, pull-ups, and specific power racks, including recommendations for various exercise needs.
- Strategic layout planning for multi-purpose garages, including how to measure and partition space effectively for gym use alongside vehicles or storage.. Strategic layout planning for multi-purpose garages, including how to measure and partition space effectively for gym use alongside vehicles or storage.
- Entry and exit point measurements for successful equipment delivery, ensuring large items can physically fit into the garage space.. Entry and exit point measurements for successful equipment delivery, ensuring large items can physically fit into the garage space.
- Electrical outlet placement and ventilation considerations based on equipment layout and space dimensions for optimal airflow and power access.. Electrical outlet placement and ventilation considerations based on equipment layout and space dimensions for optimal airflow and power access.
Choose this approach when
- Buy the piece that removes the biggest training bottleneck first, not the piece that looks best in a finished gym photo.
- Check footprint, storage, warranty, return rules, and replacement parts before ordering.
- A cheaper item is not cheaper if it forces a second purchase or blocks the main lift lane.
- You can explain where the item starts, where it goes during the workout, and where it returns afterward.
- The choice improves the main training lane instead of only making the room look more finished.
- The setup still works on a tired day when you are less careful about putting everything back perfectly.
Before-and-after layout check
- Measure the clear walking lane with the garage door open and closed.
- Mark the equipment footprint with painter tape, including the space needed to load, unload, and turn around.
- Stand where you will start the workout and make sure the first action is obvious.
- Put the heaviest or most awkward item back in its storage spot three times; if that feels clumsy, move the storage lower or closer.
- Check whether the setup still leaves a simple path for cleaning, parking, trash bins, bikes, or family gear.
- Take one photo from the garage entry and one photo from the rack area; if either view looks blocked, simplify before buying more.
When to keep it simple
Do not overbuild this page’s recommendation into a full-room remodel if the bottleneck is small. For many garage gyms, the right next move is one clear return spot, one better measurement, or one safer walking lane. Upgrade only after the current setup proves what is actually slowing down the workout.
For a deeper plan, pair this page with the garage gym measurement checklist, the layout cheat sheet, and the organization planner.
Garage Gym Reset Kit
Measure the garage, choose the storage path, and turn the plan into a printable checklist before buying more equipment.
See the Garage Gym Reset KitNumbers to capture before buying
Use these numbers as planning checks, not as live product claims. Final purchases should be verified against the current listing and manufacturer instructions.
- Core measurements: Record wall-to-wall width, wall-to-door depth, ceiling height, garage-door track height, doorway swing, car clearance, rack footprint, bench footprint, and bar path.
- Barbell reference: A standard 7 ft Olympic-style barbell is roughly 86.5 in long; Rogue's Ohio Power Bar FAQ lists exact length as 86.52 in. Keep extra side clearance for loading plates.
- Shared-garage test: Tape the rack, bench, car door, and walking lane on the floor before buying anything wall-mounted or heavy.