
Best for: one-car garage gyms, small home gyms, shared garage setups, and anyone trying to organize bars, plates, bands, cable attachments, shelves, and wall storage without blocking the workout lane.
Garage Gym Reset Kit
Measure the garage, choose the storage path, and turn the plan into a printable checklist before buying more equipment.
See the Garage Gym Reset KitGarage gym layout infographic
This visual cheat sheet shows a simple way to think about a garage gym layout: keep the middle useful, store gear near the station where it is used, and avoid creating a wall of equipment that blocks parking, walking, or loading plates.
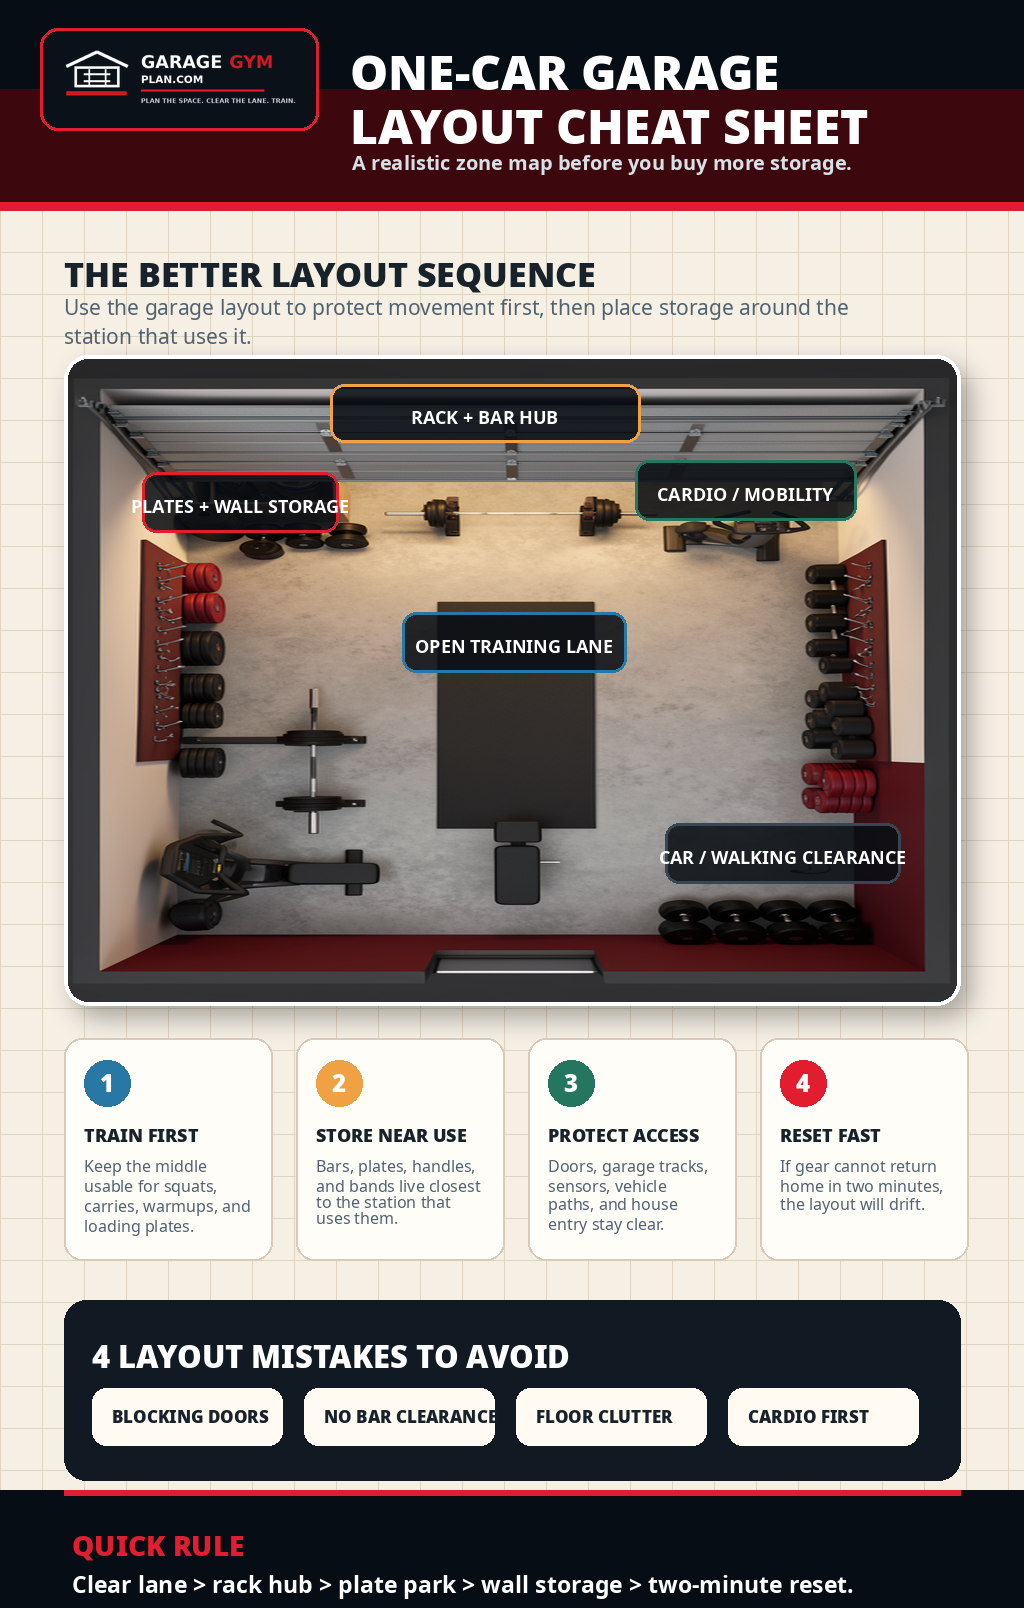
Start with these five layout zones
1. Training lane
The training lane is the open floor space where you lift, carry, pull, warm up, or move plates. Protect this area before choosing storage products.
- Keep loose bars, plates, bands, and boxes out of the lane.
- Check that mat edges do not curl into the path.
- Leave room to load and unload the bar without stepping around clutter.
2. Rack and bar zone
Most small garage gyms work better when the rack and bar storage are treated as one zone. Store frequently used bars near the rack, not across the garage.
- Use wall-mounted storage only when mounting and clearance are verified.
- Use vertical bar storage when drilling is not a good option.
- Check specialty bars separately because handles and frames can need extra room.
3. Plate and loading zone
Plates should live near the lifts that use them. If the plate tree is too far away, the floor becomes temporary storage after every workout.
- Keep change plates visible and easy to return.
- Store deadlift jack wedges or mini jacks near the plates.
- Avoid plate storage that blocks rack movement, doors, or car paths.
4. Wall and accessory zone
Wall storage is useful for bands, handles, collars, jump ropes, straps, and light accessories. It is not automatically the right answer for every heavy item.
- Hang frequent-use cable attachments near the cable station.
- Use labeled bins only for low-use backups or soft accessories.
- Verify product instructions before mounting heavy storage.
5. Shared garage zone
If the garage still stores a vehicle, bikes, tools, or household items, mark the shared-space boundaries before installing storage.
- Measure car door swing and bumper clearance.
- Keep garage door tracks, sensors, and house entry paths clear.
- Create one household-return bin so random items do not creep into the gym zone.
Printable garage gym planning checklist
Use the checklist below when walking the garage with a tape measure. It expands the infographic into a practical setup sequence.
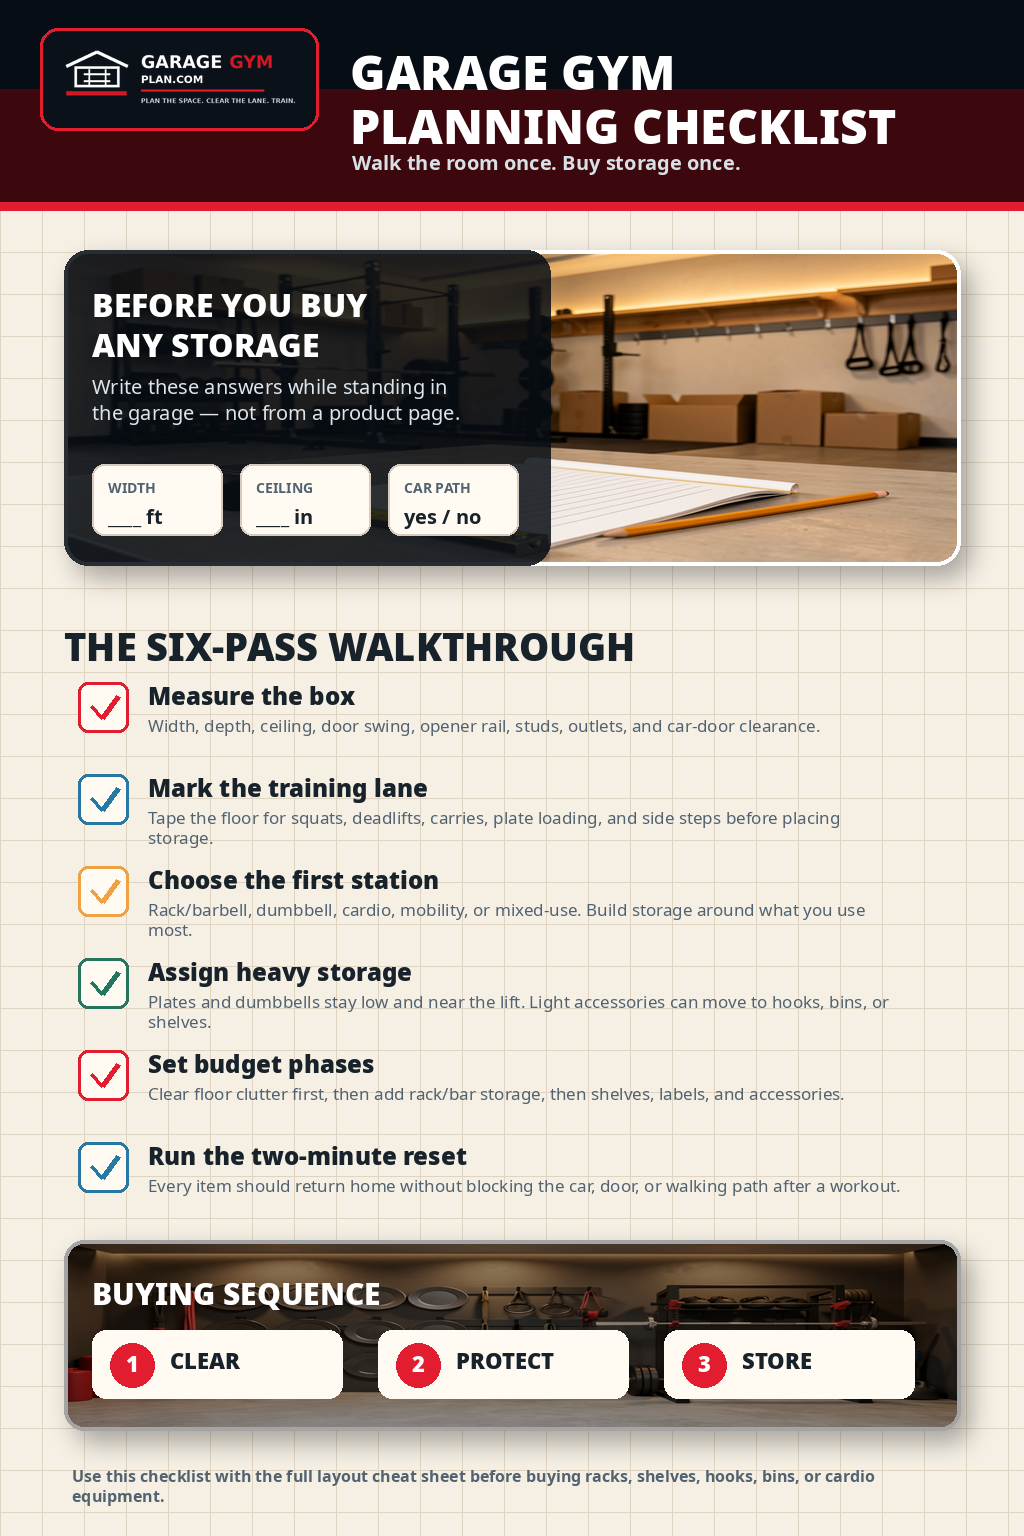
Planning checklist: measure before buying storage
Measure the space
- [ ] Garage width and length
- [ ] Training lane width and length
- [ ] Rack-to-wall clearance
- [ ] Door swing and house entry path
- [ ] Garage door track and sensor clearance
- [ ] Car parking and car-door clearance
Sort the gear
- [ ] Daily-use bars and plates
- [ ] Weekly accessories: bands, collars, handles
- [ ] Specialty bars and oversized items
- [ ] Low-use backups and spare parts
- [ ] Household items that do not belong in the gym lane
Choose the storage phase
- [ ] Phase 1: floor cleared and lifting lane protected
- [ ] Phase 2: barbell and plate homes assigned
- [ ] Phase 3: wall/rack accessory storage added
- [ ] Phase 4: shelves, bins, and labels cleaned up
- [ ] Phase 5: two-minute reset habit tested
Cheat-sheet decision table
Use this table after the infographic to turn the five layout zones into a first build order.
| If this is your main problem | Start with | Delay buying | Why | Compare |
|---|---|---|---|---|
| The garage still needs to park a car | Car door swing, walking lane, and fold-away or one-wall equipment. | Oversized plate trees and fixed benches. | Parking failure is usually what kills shared garage gyms first. | View options |
| The ceiling is low | Rack height, pressing alternatives, and light/track clearance. | Tall racks, high pull-up bars, and overhead storage above lifting zones. | Clearance limits should decide the equipment, not the other way around. | View options |
| The room feels cluttered | Storage zones for plates, dumbbells, accessories, and cleaning gear. | More specialty attachments. | A cleaner use-point system makes the gym feel larger without adding square footage. | View options |
| You are building in phases | Rack lane, flooring, plate loading, then storage. | Decorative upgrades and duplicate accessories. | The first phase should make training possible and safe; later phases can improve speed and polish. | Plan first |
Common small garage gym layout mistakes
- Buying storage before measuring. A rack, shelf, panel, or bar holder can look small online and still block a door, car lane, or bar path.
- Using deep bins for daily-use items. Bands, collars, handles, and straps usually stay cleaner when they are visible and easy to return.
- Putting plates too far from the bar. The farther the plates live from the lift, the more likely the floor becomes storage.
- Treating wall space as unlimited. Garage door tracks, outlets, studs, shelves, windows, and car clearance can all limit what a wall can safely hold.
- Skipping the reset rule. The layout is not working if it cannot be reset in about two minutes after a normal workout.
Related garage gym planning guides
- Small garage gym storage for tight one-car and shared spaces.
- Garage gym wall storage for wall panels, hooks, racks, rails, and safety checks.
- Garage gym storage systems for choosing between wall, rack, shelf, bin, and floor storage.
- Garage gym organization checklist for the full printable cleanup workflow.
Embed this garage gym layout infographic
You can share this infographic on your site, blog, or resource page. Please keep the attribution link so people can find the full checklist and planner.
Safety note: This page is general planning guidance. Always verify product instructions, wall structure, mounting requirements, load limits, and clearance before installing storage or training equipment.
- Lowest height: ceiling, opener rail, shelves, ducts, or beams above the training zone.
- Training width: barbell sleeve space, dumbbell pickup room, and side steps.
- Training depth: rack depth, bench travel, and open floor.
- Garage function: car doors, house entry, utilities, and storage access.
- Reset path: where the bench, bars, plates, and accessories go after training.
- One-car: one main lane, vertical storage, compact rack or dumbbell-first setup.
- Two-car: one training bay, one flexible bay, shared storage on a planned wall.
- Half-garage: mat boundary, folding or shallow gear, and strict reset rules.
- Low ceiling: shorter rack, dumbbell work, landmine options, and lower storage.
- Test the bench path, not just the rack rectangle.
- Test bar loading with imaginary plates on both sleeves.
- Test the car or storage boundary with doors and bins included.
- Test cleanup: every item should have a home within a few steps.
- Pass: workout starts quickly and garage functions still work.
- Tight: one planned setup step is required, but safety remains clear.
- Redesign: equipment blocks movement, loading, doors, car access, or utility access.
- Buy now: items that fit the marked lane and unlock training.
- Buy next: flooring, storage, or lighting that reduces friction.
- Buy later: bulky upgrades that need proof the room can support them.
- Step one: fixed garage features and required access paths.
- Step two: training rectangle and open floor lane.
- Step three: rack, bench, plates, dumbbells, and bar storage.
- Step four: setup and reset movements for a normal workout.
- Step five: pass, tight, or redesign score before shopping.
- Low ceiling: avoid tall pull-up plans and check overhead press variations.
- Narrow width: prioritize dumbbells, shorter bars, landmine work, or careful rack placement.
- Shared parking: define what moves, where it moves, and how it returns.
- Storage-heavy garage: clear the non-gym wall before buying another gym piece.
Quick layout decision
Best move: choose the layout that protects your training lane and required garage access before choosing more equipment.
| Your constraint | Start with | Wait on |
|---|---|---|
| One-car garage | One clear training lane, vertical storage, compact rack or dumbbell-first setup | Bulky machines or extra benches |
| Two-car garage | One training bay, one flexible bay, shared wall storage | Spreading gear across both bays |
| Car still parks inside | Fold-away or movable pieces with a marked reset zone | Fixed storage that blocks doors or walking paths |
| Low ceiling | Dumbbell, landmine, and shorter-rack planning | Tall pull-up setups before measuring overhead clearance |
Measure ceiling height, barbell width, bench travel, car-door swing, and storage return path before buying the next large item.
Measurement and buying sanity checks
Use these checks as planning help, not as live product claims.
- Measure first: Record the exact wall width, depth, ceiling height, car-door swing, walking lane, and reset location before buying storage.
- Verify product details: Check current price, dimensions, weight capacity, hardware, shipping, return policy, and manufacturer instructions on the live listing.
- Protect the lane: A product is a bad fit if it creates a toe-stub, blocks the car, hides daily gear, or requires moving unrelated items before training.